XOR - Xtreme Off-Road Builds
Want more content like this?
Join the PowerNation Email NewsletterParts Used In This Episode
Dustless Blasting
DB500 Mobile S
Lincoln Electric
Lincoln Electric is the official welding supplier to XOR
Matco Tools
Matco Tools are the official tool supplier of XOR
The Industrial Depot
Tools, Hardware, and Shop Supplies
Episode Transcript
(Narrator)>> Today Eliza and Jeremy are starting the conversion of their 1963 Willys into a mud racing mega truck. They're cutting up the chassis, blasting it clean. Then boxing the frame to withstand the 1,000 plus horsepower they're gonna throw it. It's all right here on XOR. ♪ ♪
(Jeremy)>> Hey guys, Welcome to XOR. Now it's time for us to get serious about our next project. This is what we're calling "The Wicked Wet Willys", and it'll be a 1,000 plus horsepower mudslinging mega truck. And hopefully be sitting on tires that are over 50 inches tall, and those tires should be spinning at over 100 miles an hours.
(Eliza)>> And to get that accomplished this o-e frame is gonna need a little bit of help, and that calls for boxing her up and lots of modifications.
(Jeremy)>> So when we get done with the chassis there's not gonna be a whole lot left. So that means bumpers got to go, axle's got to go, and steering has got to go.
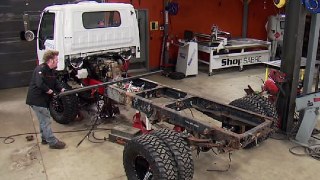
(Eliza)>> What's leaving back here is rear axle, leaf, hitch, and rear bumper. ♪ ♪ [ torch cutting metal ] ♪ ♪
(Jeremy)>> And the first thing to go was this homemade front bumper. This thing was definitely welded on here to stay. Even though it's not as precise as the new modern cutting equipment, the good old fashioned oxy-acetylene torch is sometimes all you need to tackle a big job like this. And besides, it doesn't have to be pretty. We just want to make the pieces fit the floor. ♪ ♪ Now we're not gonna be saving anything that's on this chassis. So I'm just gonna cut right through the drag link. [ torch cutting metal ]
(Jeremy)>> These shackles are stock on our Willys wagon, and since we're not keeping any suspension pieces they're gonna go. [ torch cutting metal ] ♪ ♪
(Jeremy)>> That's a quick and easy way to get rid of a lot of stuff fast. ♪ ♪ And up next is this mystery steering box installed by the previous owner. [ torch cutting metal ] ♪ ♪
(Jeremy)>> And this is the original cross member that the radiator sat on. Well since we're not gonna be running a radiator in the front. Ours is actually gonna be in the back of the Willys. This one is gonna have to go. ♪ ♪ And these are all just rough cuts so we can go ahead and blast our chassis. ♪ ♪
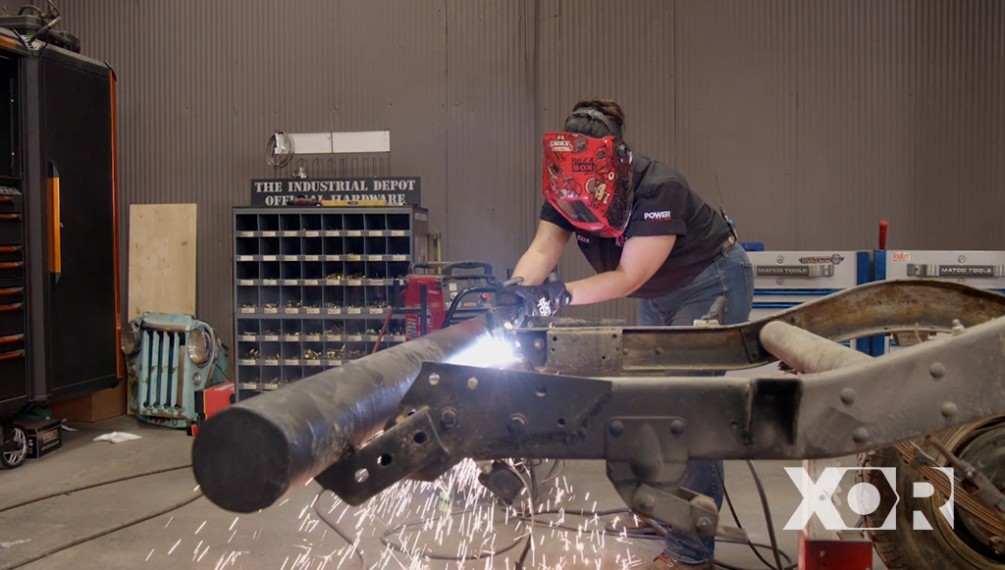
(Eliza)>> Unlike Jeremy's old fashioned torch, I've got the latest and greatest plasma torch from Lincoln Electric, the Tomahawk 1,000. [ torch cutting metal ] ♪ ♪
(Eliza)>> And even though its cuts are really clean, like Jeremy said, I'm using it to make quick work of the ugly parts that have got to go so we can get to cleaning up this chassis. [ torch cutting metal ] ♪ ♪ [ drill spinning ]
(Eliza)>> This hitch was installed like the front bumper, for the long haul. It was both bolted and welded to the frame, like someone wearing both a belt and suspenders. [ drill spinning ]
(Eliza)>> For minimal damage to the frame that we need we're using a cutoff wheel to slice through the welds. [ saw cutting metal ]
(Eliza)>> And with the welds gone I'm using the strongest tool in the shop, leverage, to get this off of our frame. ♪ ♪
(Narrator)>> Up next we're gonna blast 50 years of gunk off our chassis, and later we're welding up the riveted cross member for more strength.
(Eliza)>> Hey guys, welcome back to XOR. Now that we've got the frame all cleaned up and rid of all the brackets that we don't need it is time to get it blasted.
(Jeremy)>> So the guys over at Dustless Blasting sent us their mobile DB-500 unit. Now this has everything we need to blast our chassis and get it ready for boxing. So there's no better way to tell you how it works than to just simply show you.
(Eliza)>> This is powered by a 49 horse turbocharged diesel engine to provide 185 c-f-m of air delivery. [ hose hissing ] ♪ ♪
(Jeremy)>> You can choose from many different types of media. We are using recycled crushed glass, which has the same consistency of sand. [ hose hissing ] ♪ ♪
(Eliza)>> Our media is mixed with a small amount of water, which makes this dustless blasting. [ hose hissing ]
(Jeremy)>> There are many benefits to this being dustless. First you can easily see what you're doing. [ hose hissing ]
(Eliza)>> You don't need an expensive air breathing system, and other people can continue to work nearby in the area you are blasting in. [ hose hissing ]
(Jeremy)>> One of the benefits is that it keeps the mess to a minimum. In fact we just put down a sheet of plastic to catch any rust, paint, undercoating, or debris that may fall off the chassis. ♪ ♪ Man that's fun but I should probably share. Eliza!
(Eliza)>> I want to try. ♪ ♪ The operating pressure ranges from as low as 30 p-s-i all the way up to 150 p-s-i. This spray wand has an electrically controlled safety switch to instantly turn on and off the blasting. [ hose hissing ]
(Jeremy)>> The nozzle is made of Tungsten carbide, and focuses the media into a tight pattern to quickly blast away whatever is in its path, making it easy to get into tight places on our chassis. [ hose hissing ]
(Eliza)>> The DB-500 comes on a custom built trailer for hauling the media blast tank, compressor, 150 gallon water tank, and 100 feet of blast hose. ♪ ♪
(Jeremy)>> Another cool feature is that the unit comes with a garden hose and a water pump to clean off your work. [ hose hissing ]
(Eliza)>> The media can also be mixed with a rust inhibitor to protect your project from flash rusting for a couple of days. ♪ ♪
(Jeremy)>> And the best part was it took us less than 50 minutes to remove more than 50 years of buildup on our chassis. ♪ ♪
(Narrator)>> When we come back we're adding boxing plates in preparation for 1,000 plus horsepower.
(Eliza)>> Hey guys, welcome back to XOR. With our frame finally cleaned up and back in the shop we can begin boxing in the frame. Now originally these C-channel chassis came in with quite a bit of flex built in them.
(Jeremy)>> And that's why we're gonna be boxing in the frame. As you can see the frame moves up and down quite a bit before it comes off the other three corners of the jack stands. Well that's why we're gonna be adding a whole bunch of reinforcement on the inside, because we're gonna be throwing a whole bunch of horsepower at this and we want it to withstand as much abuse as possible. ♪ ♪ The first step is to make some patterns of your chassis, and there's no better thing to use than some cardboard you've got laying around the shop. ♪ ♪ Now that we have this piece roughly cut out we're gonna go back on the chassis and get it absolutely perfect. Now we want to leave the piece of cardboard down just a little bit because we're gonna want to fill the corner when we weld. We're not gonna want it straight up here because then we'll just be filling in the line, and when we grind there's no strength there. So we're gonna leave it down just a little bit, re-trim this piece, and then we'll go transfer it onto the metal. And make sure you cut on the inside of the marked line to get the correct measurement.
(Eliza)>> The plate steel we are using is eighth inch rolled mild steel. When using sheets like this you can request that your metal supply company sheer these to a more manageable size. We chose two foot by four foot sections, and don't worry, most supply companies will even give you one free cut.
(Jeremy)>> Coming back into play is our Lincoln Electric Tomahawk 1,000 plasma cutter. [ torch cutting metal ] ♪ ♪
(Jeremy)>> And now you can see why we cut our template smaller. When we transferred it onto the metal this piece ended up being just perfect, but before I burn this in I'm gonna take it off and true the edges up on the sander and be able to fill this perfect gap. This will be plenty strong. ♪ ♪ [ grinding metal ]
(Jeremy)>> Running our pieces across the belt sander helps us square up the edge, and it just makes it easier for us to weld on. ♪ ♪ Instead of free hand cutting here's a little tip. Use a straight edge to run your plasma torch across. That way you get the perfect cut. ♪ ♪ [ torch cutting metal ] ♪ ♪
(Jeremy)>> I'll have to cut the rest of this piece free handed because the top's got a little bit of curvature. ♪ ♪ One of the things the dustless blaster couldn't take off was the slag left over from torching. So I'm just gonna get it all cleaned up and get prepped for welding. ♪ ♪
(Eliza)>> We're using our brand new Lincoln Electric Power Mig 260. ♪ ♪
(Jeremy)>> One of our favorite tools in the shop is a good pair of locking pliers. This'll help hold the templates in place. [ welder crackling ]
(Jeremy)>> A couple of good welds staggered far apart will get you started. Then it's just a matter of filling in the gaps. ♪ ♪ Now when it comes time to grind on the chassis that you just got done working on you've got a bunch of different options. You can use a little three inch grinding wheel on your cutoff tool. You can use a four inch grinding wheel, or a four inch flap disc on your electric grinder. You can use a four inch sanding disc on your air grinder, or you can step up and use a seven inch disc for the big seven inch grinder, and that's what we're gonna be using on our chassis. And the reason why we're using this is because it's got the largest surface area possible. That way we can keep it nice and flat to the top of the chassis and nice and parallel to our new boxing plate, leaving all that strength in the weld we just put in and making our new plate as strong as possible. And this thing is a beast. So make sure you're wearing all of your safety equipment. Your gloves, your ear protection, your face shield, and your safety glasses. We're gonna start with 36 grit to get the cutting done quickly. Then we'll move to 80 grit to finish it off. Remember to keep the grinder as flat as possible on both planes. That way you'll leave a nice, crisp edge without removing too much of the weld. ♪ ♪
(Narrator)>> After the break we're reinforcing the cross member, stick around!
(Eliza)>> Hey guys, welcome back to XOR. With most of our frame plates tacked in we can talk about reinforcing our cross member. Now from the factory most cross members come either riveted in or bolted in, and that's to allow for flex on the frame, but we want our frame to be as rigid as we can get it. So we are going to be welding along the seams for added strength. The cross member has a top plate that is riveted on. Underneath this plate is a bracket that is riveted to the outer part of the C-channel frame rails. The cross member is also riveted to this bracket, and that makes the junction a four riveted component. [ welder crackling ]
(Eliza)>> Now the reason why the factory wanted flex in the frame is so that the chassis would have a long life and stay on the roads. A very stiff chassis would eventually crack from pot holes, vibration, and road conditions. ♪ ♪ In racing however it is the opposite. We are looking for a frame that will not dampen the energy transfer from drivetrain to axles. [ welder crackling ] ♪ ♪
(Eliza)>> For prepping the metal in the tight spaces underneath the top plate we are using our new Matco 16 volt cordless right angle die grinder with a wire wheel. [ welder crackling ] ♪ ♪
(Eliza)>> For welding these structural frame pieces we are using Super Arc L-56 wire. It's point zero-three-five sized mild steel wire that is uniquely alloyed for higher strength levels, and it's copper coated for long contact tip life, and it feeds easily through the want. [ welder crackling ] ♪ ♪
(Eliza)>> When welding overhead or with the wand vertical it's best to turn up your wire speed, but there is no magic number. Depending on what you're welding and your equipment that can vary from a couple more feet per second to as much as a lot of feet per second. Now welding machines will vary, but for this job our 260 is running at approximately 15 volts and using around 108 amps for this metal thickness. For more information about anything you've seen on today's show visit us at Powernation TV dot com.
(Jeremy)>> For those of you guys that just got done doing a big project like your chassis, and if this was the last step in your chassis build before you moved on to your next step, well you're gonna want to coat your chassis with something. Well this is Duplicolor's rust barrier. This is a rust preventative coating. You can spray it on rust or your bare chassis. It's corrosion resistant and when you're all done you can even top coat it. ♪ ♪ You guys are out in your shop and cutting out custom pieces for your project, you've got a couple of different options on how you can make those cuts. You can use a regular cutoff wheel. You can use a plasma cutter, or you can use a regular torch. Well if you use a plasma torch and the regular torch you're gonna have something left behind on the edge of the metal and that's called slag. Well we're gonna show you a couple of quick ways to get rid of that slag so you don't spend all day at it. And first up is a regular hammer and a chisel. Now make sure you put your safety glasses on because your slag's gonna fly everywhere. If you set this right on the corner of the slag and the edge, and a couple of little taps, should be able to break it off. [ hammer tapping metal ] ♪ ♪
(Jeremy)>> And another option is to use what's called a chipper hammer. Now this is pretty much the same thing as your hammer and chisel it's just combined. The next is a set of flat files. Now if you've got a good, clean file this should cut nice and quickly. It's gonna take you a little bit of time but when you're done your edge is gonna be perfect. [ metal scraping ]
(Jeremy)>> And up next is a regular grinder with a flap disc. Now this'll cut pretty quick but you might go through a couple of discs. [ grinder spinning ] ♪ ♪
(Jeremy)>> And the last way to try to get the slag off of your piece is to just use a regular hammer. Now the slag is just a little pool of metal that ended up on your actual piece when you were done cutting. So if you pound directly on the corner of where the slag is sitting it should just come clean off. [ hammer tapping metal ] ♪ ♪
(Jeremy)>> And with the edge all nice and clean it's time to actually straighten it out. So you can grab your flap disc on your grinder and give it a little touch, or you can take it out of the vice and go over to the belt sander. Now a belt sander is a great piece to have in your shop. It comes with many different types of belts in many different types of grits, but just be careful because you can get really carried away when you're cutting. And remember as always, safety first. ♪ ♪ And now that your parts are all nice, prepped, and cleaned you can start welding.
Show Full Transcript
(Jeremy)>> Hey guys, Welcome to XOR. Now it's time for us to get serious about our next project. This is what we're calling "The Wicked Wet Willys", and it'll be a 1,000 plus horsepower mudslinging mega truck. And hopefully be sitting on tires that are over 50 inches tall, and those tires should be spinning at over 100 miles an hours.
(Eliza)>> And to get that accomplished this o-e frame is gonna need a little bit of help, and that calls for boxing her up and lots of modifications.
(Jeremy)>> So when we get done with the chassis there's not gonna be a whole lot left. So that means bumpers got to go, axle's got to go, and steering has got to go.
(Eliza)>> What's leaving back here is rear axle, leaf, hitch, and rear bumper. ♪ ♪ [ torch cutting metal ] ♪ ♪
(Jeremy)>> And the first thing to go was this homemade front bumper. This thing was definitely welded on here to stay. Even though it's not as precise as the new modern cutting equipment, the good old fashioned oxy-acetylene torch is sometimes all you need to tackle a big job like this. And besides, it doesn't have to be pretty. We just want to make the pieces fit the floor. ♪ ♪ Now we're not gonna be saving anything that's on this chassis. So I'm just gonna cut right through the drag link. [ torch cutting metal ]
(Jeremy)>> These shackles are stock on our Willys wagon, and since we're not keeping any suspension pieces they're gonna go. [ torch cutting metal ] ♪ ♪
(Jeremy)>> That's a quick and easy way to get rid of a lot of stuff fast. ♪ ♪ And up next is this mystery steering box installed by the previous owner. [ torch cutting metal ] ♪ ♪
(Jeremy)>> And this is the original cross member that the radiator sat on. Well since we're not gonna be running a radiator in the front. Ours is actually gonna be in the back of the Willys. This one is gonna have to go. ♪ ♪ And these are all just rough cuts so we can go ahead and blast our chassis. ♪ ♪
(Eliza)>> Unlike Jeremy's old fashioned torch, I've got the latest and greatest plasma torch from Lincoln Electric, the Tomahawk 1,000. [ torch cutting metal ] ♪ ♪
(Eliza)>> And even though its cuts are really clean, like Jeremy said, I'm using it to make quick work of the ugly parts that have got to go so we can get to cleaning up this chassis. [ torch cutting metal ] ♪ ♪ [ drill spinning ]
(Eliza)>> This hitch was installed like the front bumper, for the long haul. It was both bolted and welded to the frame, like someone wearing both a belt and suspenders. [ drill spinning ]
(Eliza)>> For minimal damage to the frame that we need we're using a cutoff wheel to slice through the welds. [ saw cutting metal ]
(Eliza)>> And with the welds gone I'm using the strongest tool in the shop, leverage, to get this off of our frame. ♪ ♪
(Narrator)>> Up next we're gonna blast 50 years of gunk off our chassis, and later we're welding up the riveted cross member for more strength.
(Eliza)>> Hey guys, welcome back to XOR. Now that we've got the frame all cleaned up and rid of all the brackets that we don't need it is time to get it blasted.
(Jeremy)>> So the guys over at Dustless Blasting sent us their mobile DB-500 unit. Now this has everything we need to blast our chassis and get it ready for boxing. So there's no better way to tell you how it works than to just simply show you.
(Eliza)>> This is powered by a 49 horse turbocharged diesel engine to provide 185 c-f-m of air delivery. [ hose hissing ] ♪ ♪
(Jeremy)>> You can choose from many different types of media. We are using recycled crushed glass, which has the same consistency of sand. [ hose hissing ] ♪ ♪
(Eliza)>> Our media is mixed with a small amount of water, which makes this dustless blasting. [ hose hissing ]
(Jeremy)>> There are many benefits to this being dustless. First you can easily see what you're doing. [ hose hissing ]
(Eliza)>> You don't need an expensive air breathing system, and other people can continue to work nearby in the area you are blasting in. [ hose hissing ]
(Jeremy)>> One of the benefits is that it keeps the mess to a minimum. In fact we just put down a sheet of plastic to catch any rust, paint, undercoating, or debris that may fall off the chassis. ♪ ♪ Man that's fun but I should probably share. Eliza!
(Eliza)>> I want to try. ♪ ♪ The operating pressure ranges from as low as 30 p-s-i all the way up to 150 p-s-i. This spray wand has an electrically controlled safety switch to instantly turn on and off the blasting. [ hose hissing ]
(Jeremy)>> The nozzle is made of Tungsten carbide, and focuses the media into a tight pattern to quickly blast away whatever is in its path, making it easy to get into tight places on our chassis. [ hose hissing ]
(Eliza)>> The DB-500 comes on a custom built trailer for hauling the media blast tank, compressor, 150 gallon water tank, and 100 feet of blast hose. ♪ ♪
(Jeremy)>> Another cool feature is that the unit comes with a garden hose and a water pump to clean off your work. [ hose hissing ]
(Eliza)>> The media can also be mixed with a rust inhibitor to protect your project from flash rusting for a couple of days. ♪ ♪
(Jeremy)>> And the best part was it took us less than 50 minutes to remove more than 50 years of buildup on our chassis. ♪ ♪
(Narrator)>> When we come back we're adding boxing plates in preparation for 1,000 plus horsepower.
(Eliza)>> Hey guys, welcome back to XOR. With our frame finally cleaned up and back in the shop we can begin boxing in the frame. Now originally these C-channel chassis came in with quite a bit of flex built in them.
(Jeremy)>> And that's why we're gonna be boxing in the frame. As you can see the frame moves up and down quite a bit before it comes off the other three corners of the jack stands. Well that's why we're gonna be adding a whole bunch of reinforcement on the inside, because we're gonna be throwing a whole bunch of horsepower at this and we want it to withstand as much abuse as possible. ♪ ♪ The first step is to make some patterns of your chassis, and there's no better thing to use than some cardboard you've got laying around the shop. ♪ ♪ Now that we have this piece roughly cut out we're gonna go back on the chassis and get it absolutely perfect. Now we want to leave the piece of cardboard down just a little bit because we're gonna want to fill the corner when we weld. We're not gonna want it straight up here because then we'll just be filling in the line, and when we grind there's no strength there. So we're gonna leave it down just a little bit, re-trim this piece, and then we'll go transfer it onto the metal. And make sure you cut on the inside of the marked line to get the correct measurement.
(Eliza)>> The plate steel we are using is eighth inch rolled mild steel. When using sheets like this you can request that your metal supply company sheer these to a more manageable size. We chose two foot by four foot sections, and don't worry, most supply companies will even give you one free cut.
(Jeremy)>> Coming back into play is our Lincoln Electric Tomahawk 1,000 plasma cutter. [ torch cutting metal ] ♪ ♪
(Jeremy)>> And now you can see why we cut our template smaller. When we transferred it onto the metal this piece ended up being just perfect, but before I burn this in I'm gonna take it off and true the edges up on the sander and be able to fill this perfect gap. This will be plenty strong. ♪ ♪ [ grinding metal ]
(Jeremy)>> Running our pieces across the belt sander helps us square up the edge, and it just makes it easier for us to weld on. ♪ ♪ Instead of free hand cutting here's a little tip. Use a straight edge to run your plasma torch across. That way you get the perfect cut. ♪ ♪ [ torch cutting metal ] ♪ ♪
(Jeremy)>> I'll have to cut the rest of this piece free handed because the top's got a little bit of curvature. ♪ ♪ One of the things the dustless blaster couldn't take off was the slag left over from torching. So I'm just gonna get it all cleaned up and get prepped for welding. ♪ ♪
(Eliza)>> We're using our brand new Lincoln Electric Power Mig 260. ♪ ♪
(Jeremy)>> One of our favorite tools in the shop is a good pair of locking pliers. This'll help hold the templates in place. [ welder crackling ]
(Jeremy)>> A couple of good welds staggered far apart will get you started. Then it's just a matter of filling in the gaps. ♪ ♪ Now when it comes time to grind on the chassis that you just got done working on you've got a bunch of different options. You can use a little three inch grinding wheel on your cutoff tool. You can use a four inch grinding wheel, or a four inch flap disc on your electric grinder. You can use a four inch sanding disc on your air grinder, or you can step up and use a seven inch disc for the big seven inch grinder, and that's what we're gonna be using on our chassis. And the reason why we're using this is because it's got the largest surface area possible. That way we can keep it nice and flat to the top of the chassis and nice and parallel to our new boxing plate, leaving all that strength in the weld we just put in and making our new plate as strong as possible. And this thing is a beast. So make sure you're wearing all of your safety equipment. Your gloves, your ear protection, your face shield, and your safety glasses. We're gonna start with 36 grit to get the cutting done quickly. Then we'll move to 80 grit to finish it off. Remember to keep the grinder as flat as possible on both planes. That way you'll leave a nice, crisp edge without removing too much of the weld. ♪ ♪
(Narrator)>> After the break we're reinforcing the cross member, stick around!
(Eliza)>> Hey guys, welcome back to XOR. With most of our frame plates tacked in we can talk about reinforcing our cross member. Now from the factory most cross members come either riveted in or bolted in, and that's to allow for flex on the frame, but we want our frame to be as rigid as we can get it. So we are going to be welding along the seams for added strength. The cross member has a top plate that is riveted on. Underneath this plate is a bracket that is riveted to the outer part of the C-channel frame rails. The cross member is also riveted to this bracket, and that makes the junction a four riveted component. [ welder crackling ]
(Eliza)>> Now the reason why the factory wanted flex in the frame is so that the chassis would have a long life and stay on the roads. A very stiff chassis would eventually crack from pot holes, vibration, and road conditions. ♪ ♪ In racing however it is the opposite. We are looking for a frame that will not dampen the energy transfer from drivetrain to axles. [ welder crackling ] ♪ ♪
(Eliza)>> For prepping the metal in the tight spaces underneath the top plate we are using our new Matco 16 volt cordless right angle die grinder with a wire wheel. [ welder crackling ] ♪ ♪
(Eliza)>> For welding these structural frame pieces we are using Super Arc L-56 wire. It's point zero-three-five sized mild steel wire that is uniquely alloyed for higher strength levels, and it's copper coated for long contact tip life, and it feeds easily through the want. [ welder crackling ] ♪ ♪
(Eliza)>> When welding overhead or with the wand vertical it's best to turn up your wire speed, but there is no magic number. Depending on what you're welding and your equipment that can vary from a couple more feet per second to as much as a lot of feet per second. Now welding machines will vary, but for this job our 260 is running at approximately 15 volts and using around 108 amps for this metal thickness. For more information about anything you've seen on today's show visit us at Powernation TV dot com.
(Jeremy)>> For those of you guys that just got done doing a big project like your chassis, and if this was the last step in your chassis build before you moved on to your next step, well you're gonna want to coat your chassis with something. Well this is Duplicolor's rust barrier. This is a rust preventative coating. You can spray it on rust or your bare chassis. It's corrosion resistant and when you're all done you can even top coat it. ♪ ♪ You guys are out in your shop and cutting out custom pieces for your project, you've got a couple of different options on how you can make those cuts. You can use a regular cutoff wheel. You can use a plasma cutter, or you can use a regular torch. Well if you use a plasma torch and the regular torch you're gonna have something left behind on the edge of the metal and that's called slag. Well we're gonna show you a couple of quick ways to get rid of that slag so you don't spend all day at it. And first up is a regular hammer and a chisel. Now make sure you put your safety glasses on because your slag's gonna fly everywhere. If you set this right on the corner of the slag and the edge, and a couple of little taps, should be able to break it off. [ hammer tapping metal ] ♪ ♪
(Jeremy)>> And another option is to use what's called a chipper hammer. Now this is pretty much the same thing as your hammer and chisel it's just combined. The next is a set of flat files. Now if you've got a good, clean file this should cut nice and quickly. It's gonna take you a little bit of time but when you're done your edge is gonna be perfect. [ metal scraping ]
(Jeremy)>> And up next is a regular grinder with a flap disc. Now this'll cut pretty quick but you might go through a couple of discs. [ grinder spinning ] ♪ ♪
(Jeremy)>> And the last way to try to get the slag off of your piece is to just use a regular hammer. Now the slag is just a little pool of metal that ended up on your actual piece when you were done cutting. So if you pound directly on the corner of where the slag is sitting it should just come clean off. [ hammer tapping metal ] ♪ ♪
(Jeremy)>> And with the edge all nice and clean it's time to actually straighten it out. So you can grab your flap disc on your grinder and give it a little touch, or you can take it out of the vice and go over to the belt sander. Now a belt sander is a great piece to have in your shop. It comes with many different types of belts in many different types of grits, but just be careful because you can get really carried away when you're cutting. And remember as always, safety first. ♪ ♪ And now that your parts are all nice, prepped, and cleaned you can start welding.
