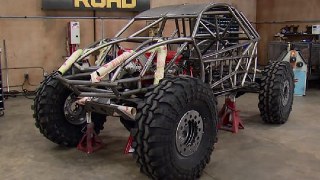
XOR - Xtreme Off-Road Builds
Want more content like this?
Join the PowerNation Email NewsletterParts Used In This Episode
Lincoln Electric
Lincoln Electric is the official welding supplier to XOR
Matco Tools
Matco Tools are the official tool supplier of XOR
The Industrial Depot
Tools, Hardware, and Shop Supplies
Episode Transcript
(Narrator)>> Today Eliza and Jeremy are on the road to pick up a truck to start a brand new project. Then they're back in the shop extending their pre-runner's cage and building a skid plate to protect their fuel cell. Finally they're getting their radiator mounted in just the right spot to keep their v-eight Coyote running cool. It's all right here on XOR. ♪ ♪
(Jeremy)>> Hey guys, welcome to XOR. Well the sun is shining. We're out on the road pulling the big trailer and it's gonna be a great day because today is new project day.
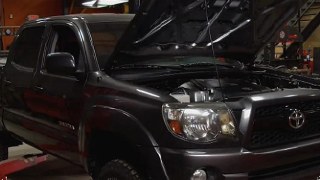
(Eliza)>> That's right! We're picking up a 2001 Toyota Tacoma that we've already got solid plans for and high hopes. ♪ ♪
(Jeremy)>> Where is this thing? It's got to be around here somewhere.
(Eliza)>> Oh, there it is. ♪ ♪ Oh it's so pretty! ♪ ♪
(Jeremy)>> Oh that's gonna work perfectly.
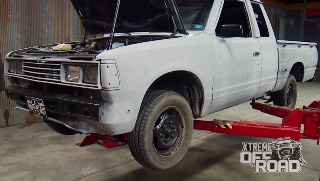
(Eliza)>> It's nice! Now this 2001 Toyota Tacoma is everything I wanted as a 16 year old newly licensed driver. Crew cab, v-six, TRD off road edition.
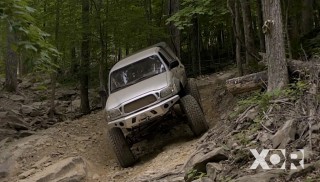
(Jeremy)>> And we are gonna cut this thing up. All of the independent suspension is gonna go. And like Eliza said, we've got solid plans for this cause underneath here is gonna be a solid axle.
(Eliza)>> And our high hopes means that the tire size is going several sizes up, and we're gonna make this our crew's utility vehicle. And this is our good friend Rudy that we bought the truck off of. He has made this the best project pickup ever because he brought us tamales.
(Jeremy)>> And I suppose we've got to come up with a name for the truck too.
(Eliza)>> Hot Tamale!
(Jeremy)>> Well where's my, you know what, never mind. I got a taco.
(Eliza)>> All right, when I talked about raising this thing up earlier, on the way over Jeremy and I decided that we want this toy sitting on 40's.
(Jeremy)>> That's right because we want this thing to be way bigger and way badder because we're gonna take this toy through some pretty serious stuff.
(Eliza)>> And speaking of toys we've got one on 35's that we need to finish up.
(Jeremy)>> Let's go work on the pre-runner.
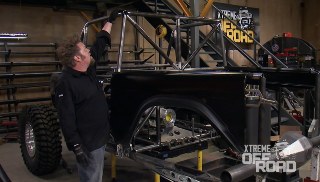
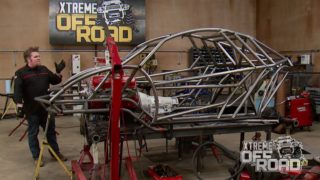
(Eliza)>> With the front end pretty much buttoned up it is time to start to make our way towards the back.
(Jeremy)>> That's right! Just like in the front we're gonna have a whole lot going on here in the rear. So we're gonna have to come up with enough tubing to mount our cooling system, our fuel system, and our spare tires.
(Eliza)>> That's a whole lot of tubing in the rear.
(Jeremy)>> The first step is to make sure that our chassis is perfectly level because we're gonna come straight up off of the chassis, or plum off the chassis, and mark a hole so we can drill and get into the inside of our roll cage. ♪ ♪ [ drill spinning ]
(Jeremy)>> Using a two inch hole saw we marry ourselves to this position. ♪ ♪ Using the masking tape as a guide, I'm gonna mark a vertical line so I can cut. I need to get a little bit deeper into the cab to make sure that I can weld completely around the roll cage. [ saw cutting metal ] ♪ ♪
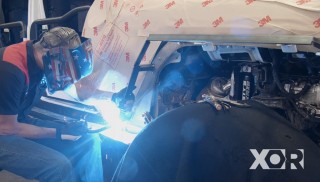
(Jeremy)>> Save that piece for later. I'm back down on the chassis. I'm gonna clean it up to prep to install the first tube. ♪ ♪ To ensure everything stays plumbed I'm using a magnetic level, and this angle shows why I cut the roof just a little bit more. And the next step is to gain access to the lower bar of the roll cage. ♪ ♪ And getting rid of what's left of the sheet metal will let the bar slide right into place. ♪ ♪ Using our magnetic level again I can mark the length of our first tie in bar. ♪ ♪ And after a quick trip to the notcher this bar can be tacked into place. [ welder crackling ] ♪ ♪
(Jeremy)>> Further down the chassis is more prep for the next piece of the puzzle. The rear bar comes down at a 45 degree angle like this because we have future plans for a spare tire carrier. And after that we're gonna add a couple of pieces of cross bracing to tie this all together. [ welder crackling ]
(Jeremy)>> And to stick with our 45 degree theme we got two more braces to tie us into the chassis. [ welder crackling ]
(Jeremy)>> All the tubing we're using in the back is the same as the front. Inch and three quarter, 120 wall d-o-m. [ welder crackling ] ♪ ♪
(Jeremy)>> Well there you go. Now that we have this side done I can go ahead and duplicate it onto the other side, but for now I know exactly where the cooling's gonna go, where our spare tire's gonna go, and where our shock mount's gonna go. So the next step is to work on building the shock mount.
(Narrator)>> Up next, we're protecting our fuel cell with a skid plate, and later we're getting our radiator mounted up high.
(Jeremy)>> Hey guys, welcome back to XOR. Now you know we're gonna be running fiberglass box sides in the back of our pre-runner. And since our fuel system's gonna be back there these are gonna offer zero protection. So we're gonna have to do a couple of things. First we're gonna have to add a bar to tie the two pieces of frame together before we cut the stock spare tire mount out of the way. Secondly we're gonna have to build the mount to actually put the fuel cell in place. And third, we're gonna build a skid plate to tie the whole thing together and protect our fuel system. And well that all starts with tubing. ♪ ♪ This bar will not only tie the two frame rails together. It will serve as a base for the fuel cell mounts. [ welder crackling ] ♪ ♪
(Jeremy)>> It's time to let the sparks fly. We're using our Lincoln Electric Tomahawk 1,000 plasma cutter to remove the stock spare tire mount. Now you can use anything to get the job done. You can use a cutoff wheel. You can use a regular torch. You can even use a sawz-all, but this sure makes short work of it. [ torch cutting metal ] ♪ ♪
(Jeremy)>> Simple as that. Just like up top, a little frame cleaning gets us started. [ grinding metal ]
(Jeremy)>> This piece will serve as a frame stiffener and will be the second mount for our fuel cell carrier. And just because we want everything to fit just right our level comes back into play, along with a quick double check of our measurements. [ welder crackling ] ♪ ♪
(Jeremy)>> And now we can start on the bottom part of our fuel cell cage. ♪ ♪ These lower cage bars are bent to accommodate the depth of our fuel cell, which measures in at 10 inches. [ welder crackling ] ♪ ♪ [ welder crackling ] ♪ ♪
(Jeremy)>> I'm using an old truck jack to support the aluminum skid plate that will help protect our fuel cell. ♪ ♪ Notice how I have shaped the front of the skid plate to match the curve of the bottom of the two cage bars. ♪ ♪ Just barely under. ♪ ♪ I'd say that's center. [ drill spinning ]
(Jeremy)>> To secure the aluminum to our bars we're using some self-tapping button head screws. [ drill spinning ] ♪ ♪
(Jeremy)>> I love using locking pliers to help hold stuff into place until it's secure. Using our two speed drill from Matco I'm using the high speed to help the self-tapping screw cut and the low speed to drive it home. [ drill spinning ] ♪ ♪
(Jeremy)>> Hopefully this fits. ♪ ♪ Perfect, and it's protected too!
(Narrator)>> When we come back we'll show you the best way to mount a radiator to the cage, stay tuned!
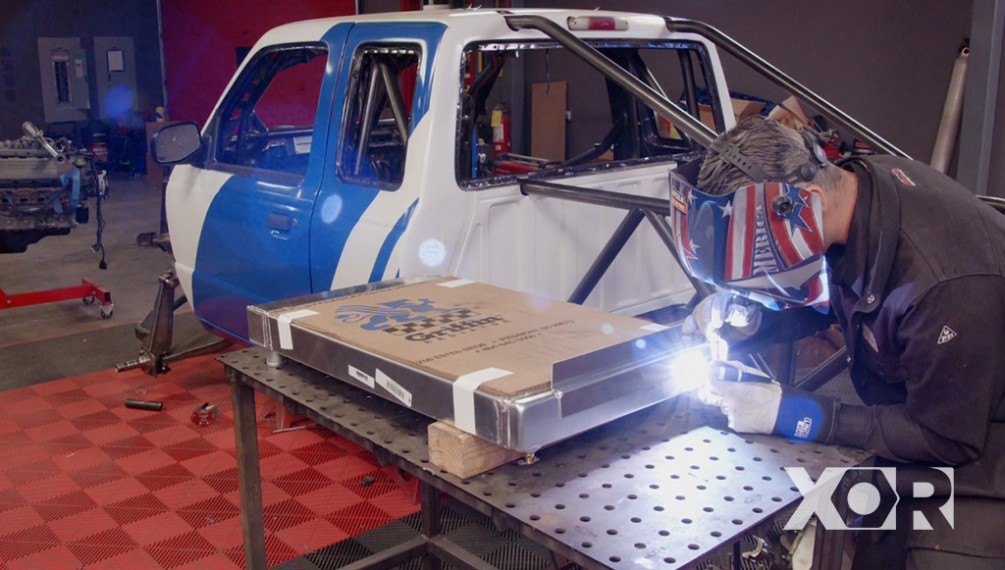
(Jeremy)>> Hey guys, welcome back to XOR and the buildup of our pre-runner Ranger. Now that the rear cage is all done we can go ahead and mount the radiator, and that all starts with some aluminum brackets. Now I've chosen to use the tig welder because it's the most efficient way and will give me the cleanest results. Going in our pre-runner is a Griffin radiator that we got from Summit Racing dot com, and it will have plenty of cooling for our Coyote. [ welder crackling ] ♪ ♪
(Jeremy)>> Once again using a pair of locking pliers to hold the radiator in place, I'm marking the holes to drill for the role cage mount. ♪ ♪ [ drill spinning ]
(Jeremy)>> Using a step drill, I'm just gonna make my way through the aluminum to put a mark on the roll cage. [ drill spinning ] ♪ ♪
(Jeremy)>> And I'll repeat this process for all four mounts. ♪ ♪ [ drill spinning ]
(Jeremy)>> In the same way we use multiple size drill bits to get to the final size we need, we're just gonna use step bits to get to that final size. [ drill spinning ]
(Jeremy)>> Doing it with a stepped drill bit just makes it a whole lot quicker. ♪ ♪ [ drill spinning ]
(Jeremy)>> To mount our radiator we're not just gonna run a bolt through these holes. We're actually gonna sleeve them to retain the strength of our roll cage. [ drill spinning ] ♪ ♪
(Jeremy)>> And the final hole size exactly matches the outside diameter of our tubing, which is seven-eighths. [ drill spinning ] ♪ ♪ [ drill spinning ] ♪ ♪
(Jeremy)>> For the sleeves we're using heavy walled seven-eighths o-d tubing. [ saw cutting metal ] ♪ ♪
(Jeremy)>> After beveling the edge of the sleeve just a little bit we'll get ready to tack these in place. ♪ ♪ And just like the mounts on the radiator, I'm gonna tig weld these into place so I can keep the welds nice and small. ♪ ♪ Now I'm just tacking these into place but you don't have to use a tig welder. You can use your mig welder but just be prepared to grind your welds off a little bit to get that perfect fit. ♪ ♪ I used 41-43 tig rod for the aluminum radiator, and for the roll cage sleeves I'm using e-r-70-s-six.
(Narrator)>> After the break we finish getting our radiator installed on the cage, stick around.
(Jeremy)>> Hey guys, welcome back to XOR and the install of our radiator on the roll cage of our pre-runner. This will keep our 400 plus horse Coyote Aluminator while running through the desert. We're just mocking this in place for now but when it comes to final install we will be using grade eight hardware from Industrial Depot with nylon lock nuts cause this thing is gonna see a lot of abuse. Notice that the inlet and outlet are facing down and towards the engine. That means we'll be plumbing in aluminum tubing to our Coyote. And after this we will test fit the fan shroud. Our radiator and fan shroud came as a kit but since we mounted our radiator on the roll cage we're gonna have to modify our fan shroud to sit down on the radiator. It turns out that the height of our roll cage tube and the height of our fan shroud are almost identical. So all we have to do is trim to fit. ♪ ♪ When cutting aluminum you can use just about any cutoff wheel. This one is just a little thinner than about 16th of an inch, and with that small of a cutting surface it's gonna slice right through this fan shroud in a hurry. So take your time. Leaving the fans bolted to the shroud helps the shroud maintain its shape while being cut and helps keep the piece from vibrating, resulting in a cleaner cut. [ saw cutting metal ] ♪ ♪
(Jeremy)>> For more information on anything on today's show got to Powernation TV dot com. ♪ ♪ Well now that you know how we mounted our radiator up here, here's why we chose to do so. We're not gonna be running any glass in the cab of the pre-runner. So that's gonna allow for all of that air to come and hit the face of the radiator. And the reason why we chose to put our fans on top of the radiator is because we were gonna hook these up as a puller style fan, and that's gonna help cool our big Coyote down. And since we're talking about air, Eliza and myself are not gonna want to be breathing all that dusty, dirty air. So we're gonna be hooking up individual driver air systems, and that's gonna pump nice clean air into our helmets. Now the only thing we have to do is find a spot to mount these.
♪ ♪ Hey guys, one of the most common things that you guys are doing out there is installing bigger wheels and tires on your truck. Well also one of the most common issues you're gonna have with that is that your tires are probably gonna end up rubbing on your inner fenders, kinda like it does here on our Tacoma. So we're gonna show you how to install a leveling kit. Now unlike a lift kit that lifts both front and rear, a leveling kit just levels out the front of the truck. So the easiest way to show you guys how to do that is to simply install it on the Tacoma. With our truck sitting on the ground we're gonna put a mark on the fender flare at about 40 inches. That way we can see how much height we gain. ♪ ♪ For this truck the first step is to remove the upper ball joint off the spindle. ♪ ♪ The next step is to remove the three nuts that hold the spring plate on. Make sure you only loosen these three nuts. Do not loosen the center nut cause bad things could happen. With the strut loose we move to the bottom to remove the bolt that holds it to the lower control arm. Now we went to Summit Racing dot com and picked up their leveling kit for our Tacoma, and it comes with everything you need to put the kit on there. It's got a couple of lift blocks, some studs to go onto the spring plate, and all the hardware, and installation's pretty simple. ♪ ♪ And that starts with applying some thread locker that comes with the kit. ♪ ♪ And then thread on the three supplied stud extensions.
Now these don't need to be a specific torque. Just get them good and tight. ♪ ♪ With those installed the supplied urethane strut spacer slides right into place. ♪ ♪ And it's as simple as that. Now all we have to do is re-install this back in the truck, set the truck on the ground, and see how much height we gained. ♪ ♪ And there you go. Looks like we picked up about two inches. Now if you're gonna be installing this kit on your truck in your driveway it's gonna take you a couple of hours, and make sure you follow the instructions for the kit that fits in your vehicle. Well once you're all done your truck will be sitting right back where it should be.
Show Full Transcript
(Jeremy)>> Hey guys, welcome to XOR. Well the sun is shining. We're out on the road pulling the big trailer and it's gonna be a great day because today is new project day.
(Eliza)>> That's right! We're picking up a 2001 Toyota Tacoma that we've already got solid plans for and high hopes. ♪ ♪
(Jeremy)>> Where is this thing? It's got to be around here somewhere.
(Eliza)>> Oh, there it is. ♪ ♪ Oh it's so pretty! ♪ ♪
(Jeremy)>> Oh that's gonna work perfectly.
(Eliza)>> It's nice! Now this 2001 Toyota Tacoma is everything I wanted as a 16 year old newly licensed driver. Crew cab, v-six, TRD off road edition.
(Jeremy)>> And we are gonna cut this thing up. All of the independent suspension is gonna go. And like Eliza said, we've got solid plans for this cause underneath here is gonna be a solid axle.
(Eliza)>> And our high hopes means that the tire size is going several sizes up, and we're gonna make this our crew's utility vehicle. And this is our good friend Rudy that we bought the truck off of. He has made this the best project pickup ever because he brought us tamales.
(Jeremy)>> And I suppose we've got to come up with a name for the truck too.
(Eliza)>> Hot Tamale!
(Jeremy)>> Well where's my, you know what, never mind. I got a taco.
(Eliza)>> All right, when I talked about raising this thing up earlier, on the way over Jeremy and I decided that we want this toy sitting on 40's.
(Jeremy)>> That's right because we want this thing to be way bigger and way badder because we're gonna take this toy through some pretty serious stuff.
(Eliza)>> And speaking of toys we've got one on 35's that we need to finish up.
(Jeremy)>> Let's go work on the pre-runner.
(Eliza)>> With the front end pretty much buttoned up it is time to start to make our way towards the back.
(Jeremy)>> That's right! Just like in the front we're gonna have a whole lot going on here in the rear. So we're gonna have to come up with enough tubing to mount our cooling system, our fuel system, and our spare tires.
(Eliza)>> That's a whole lot of tubing in the rear.
(Jeremy)>> The first step is to make sure that our chassis is perfectly level because we're gonna come straight up off of the chassis, or plum off the chassis, and mark a hole so we can drill and get into the inside of our roll cage. ♪ ♪ [ drill spinning ]
(Jeremy)>> Using a two inch hole saw we marry ourselves to this position. ♪ ♪ Using the masking tape as a guide, I'm gonna mark a vertical line so I can cut. I need to get a little bit deeper into the cab to make sure that I can weld completely around the roll cage. [ saw cutting metal ] ♪ ♪
(Jeremy)>> Save that piece for later. I'm back down on the chassis. I'm gonna clean it up to prep to install the first tube. ♪ ♪ To ensure everything stays plumbed I'm using a magnetic level, and this angle shows why I cut the roof just a little bit more. And the next step is to gain access to the lower bar of the roll cage. ♪ ♪ And getting rid of what's left of the sheet metal will let the bar slide right into place. ♪ ♪ Using our magnetic level again I can mark the length of our first tie in bar. ♪ ♪ And after a quick trip to the notcher this bar can be tacked into place. [ welder crackling ] ♪ ♪
(Jeremy)>> Further down the chassis is more prep for the next piece of the puzzle. The rear bar comes down at a 45 degree angle like this because we have future plans for a spare tire carrier. And after that we're gonna add a couple of pieces of cross bracing to tie this all together. [ welder crackling ]
(Jeremy)>> And to stick with our 45 degree theme we got two more braces to tie us into the chassis. [ welder crackling ]
(Jeremy)>> All the tubing we're using in the back is the same as the front. Inch and three quarter, 120 wall d-o-m. [ welder crackling ] ♪ ♪
(Jeremy)>> Well there you go. Now that we have this side done I can go ahead and duplicate it onto the other side, but for now I know exactly where the cooling's gonna go, where our spare tire's gonna go, and where our shock mount's gonna go. So the next step is to work on building the shock mount.
(Narrator)>> Up next, we're protecting our fuel cell with a skid plate, and later we're getting our radiator mounted up high.
(Jeremy)>> Hey guys, welcome back to XOR. Now you know we're gonna be running fiberglass box sides in the back of our pre-runner. And since our fuel system's gonna be back there these are gonna offer zero protection. So we're gonna have to do a couple of things. First we're gonna have to add a bar to tie the two pieces of frame together before we cut the stock spare tire mount out of the way. Secondly we're gonna have to build the mount to actually put the fuel cell in place. And third, we're gonna build a skid plate to tie the whole thing together and protect our fuel system. And well that all starts with tubing. ♪ ♪ This bar will not only tie the two frame rails together. It will serve as a base for the fuel cell mounts. [ welder crackling ] ♪ ♪
(Jeremy)>> It's time to let the sparks fly. We're using our Lincoln Electric Tomahawk 1,000 plasma cutter to remove the stock spare tire mount. Now you can use anything to get the job done. You can use a cutoff wheel. You can use a regular torch. You can even use a sawz-all, but this sure makes short work of it. [ torch cutting metal ] ♪ ♪
(Jeremy)>> Simple as that. Just like up top, a little frame cleaning gets us started. [ grinding metal ]
(Jeremy)>> This piece will serve as a frame stiffener and will be the second mount for our fuel cell carrier. And just because we want everything to fit just right our level comes back into play, along with a quick double check of our measurements. [ welder crackling ] ♪ ♪
(Jeremy)>> And now we can start on the bottom part of our fuel cell cage. ♪ ♪ These lower cage bars are bent to accommodate the depth of our fuel cell, which measures in at 10 inches. [ welder crackling ] ♪ ♪ [ welder crackling ] ♪ ♪
(Jeremy)>> I'm using an old truck jack to support the aluminum skid plate that will help protect our fuel cell. ♪ ♪ Notice how I have shaped the front of the skid plate to match the curve of the bottom of the two cage bars. ♪ ♪ Just barely under. ♪ ♪ I'd say that's center. [ drill spinning ]
(Jeremy)>> To secure the aluminum to our bars we're using some self-tapping button head screws. [ drill spinning ] ♪ ♪
(Jeremy)>> I love using locking pliers to help hold stuff into place until it's secure. Using our two speed drill from Matco I'm using the high speed to help the self-tapping screw cut and the low speed to drive it home. [ drill spinning ] ♪ ♪
(Jeremy)>> Hopefully this fits. ♪ ♪ Perfect, and it's protected too!
(Narrator)>> When we come back we'll show you the best way to mount a radiator to the cage, stay tuned!
(Jeremy)>> Hey guys, welcome back to XOR and the buildup of our pre-runner Ranger. Now that the rear cage is all done we can go ahead and mount the radiator, and that all starts with some aluminum brackets. Now I've chosen to use the tig welder because it's the most efficient way and will give me the cleanest results. Going in our pre-runner is a Griffin radiator that we got from Summit Racing dot com, and it will have plenty of cooling for our Coyote. [ welder crackling ] ♪ ♪
(Jeremy)>> Once again using a pair of locking pliers to hold the radiator in place, I'm marking the holes to drill for the role cage mount. ♪ ♪ [ drill spinning ]
(Jeremy)>> Using a step drill, I'm just gonna make my way through the aluminum to put a mark on the roll cage. [ drill spinning ] ♪ ♪
(Jeremy)>> And I'll repeat this process for all four mounts. ♪ ♪ [ drill spinning ]
(Jeremy)>> In the same way we use multiple size drill bits to get to the final size we need, we're just gonna use step bits to get to that final size. [ drill spinning ]
(Jeremy)>> Doing it with a stepped drill bit just makes it a whole lot quicker. ♪ ♪ [ drill spinning ]
(Jeremy)>> To mount our radiator we're not just gonna run a bolt through these holes. We're actually gonna sleeve them to retain the strength of our roll cage. [ drill spinning ] ♪ ♪
(Jeremy)>> And the final hole size exactly matches the outside diameter of our tubing, which is seven-eighths. [ drill spinning ] ♪ ♪ [ drill spinning ] ♪ ♪
(Jeremy)>> For the sleeves we're using heavy walled seven-eighths o-d tubing. [ saw cutting metal ] ♪ ♪
(Jeremy)>> After beveling the edge of the sleeve just a little bit we'll get ready to tack these in place. ♪ ♪ And just like the mounts on the radiator, I'm gonna tig weld these into place so I can keep the welds nice and small. ♪ ♪ Now I'm just tacking these into place but you don't have to use a tig welder. You can use your mig welder but just be prepared to grind your welds off a little bit to get that perfect fit. ♪ ♪ I used 41-43 tig rod for the aluminum radiator, and for the roll cage sleeves I'm using e-r-70-s-six.
(Narrator)>> After the break we finish getting our radiator installed on the cage, stick around.
(Jeremy)>> Hey guys, welcome back to XOR and the install of our radiator on the roll cage of our pre-runner. This will keep our 400 plus horse Coyote Aluminator while running through the desert. We're just mocking this in place for now but when it comes to final install we will be using grade eight hardware from Industrial Depot with nylon lock nuts cause this thing is gonna see a lot of abuse. Notice that the inlet and outlet are facing down and towards the engine. That means we'll be plumbing in aluminum tubing to our Coyote. And after this we will test fit the fan shroud. Our radiator and fan shroud came as a kit but since we mounted our radiator on the roll cage we're gonna have to modify our fan shroud to sit down on the radiator. It turns out that the height of our roll cage tube and the height of our fan shroud are almost identical. So all we have to do is trim to fit. ♪ ♪ When cutting aluminum you can use just about any cutoff wheel. This one is just a little thinner than about 16th of an inch, and with that small of a cutting surface it's gonna slice right through this fan shroud in a hurry. So take your time. Leaving the fans bolted to the shroud helps the shroud maintain its shape while being cut and helps keep the piece from vibrating, resulting in a cleaner cut. [ saw cutting metal ] ♪ ♪
(Jeremy)>> For more information on anything on today's show got to Powernation TV dot com. ♪ ♪ Well now that you know how we mounted our radiator up here, here's why we chose to do so. We're not gonna be running any glass in the cab of the pre-runner. So that's gonna allow for all of that air to come and hit the face of the radiator. And the reason why we chose to put our fans on top of the radiator is because we were gonna hook these up as a puller style fan, and that's gonna help cool our big Coyote down. And since we're talking about air, Eliza and myself are not gonna want to be breathing all that dusty, dirty air. So we're gonna be hooking up individual driver air systems, and that's gonna pump nice clean air into our helmets. Now the only thing we have to do is find a spot to mount these.
♪ ♪ Hey guys, one of the most common things that you guys are doing out there is installing bigger wheels and tires on your truck. Well also one of the most common issues you're gonna have with that is that your tires are probably gonna end up rubbing on your inner fenders, kinda like it does here on our Tacoma. So we're gonna show you how to install a leveling kit. Now unlike a lift kit that lifts both front and rear, a leveling kit just levels out the front of the truck. So the easiest way to show you guys how to do that is to simply install it on the Tacoma. With our truck sitting on the ground we're gonna put a mark on the fender flare at about 40 inches. That way we can see how much height we gain. ♪ ♪ For this truck the first step is to remove the upper ball joint off the spindle. ♪ ♪ The next step is to remove the three nuts that hold the spring plate on. Make sure you only loosen these three nuts. Do not loosen the center nut cause bad things could happen. With the strut loose we move to the bottom to remove the bolt that holds it to the lower control arm. Now we went to Summit Racing dot com and picked up their leveling kit for our Tacoma, and it comes with everything you need to put the kit on there. It's got a couple of lift blocks, some studs to go onto the spring plate, and all the hardware, and installation's pretty simple. ♪ ♪ And that starts with applying some thread locker that comes with the kit. ♪ ♪ And then thread on the three supplied stud extensions.
Now these don't need to be a specific torque. Just get them good and tight. ♪ ♪ With those installed the supplied urethane strut spacer slides right into place. ♪ ♪ And it's as simple as that. Now all we have to do is re-install this back in the truck, set the truck on the ground, and see how much height we gained. ♪ ♪ And there you go. Looks like we picked up about two inches. Now if you're gonna be installing this kit on your truck in your driveway it's gonna take you a couple of hours, and make sure you follow the instructions for the kit that fits in your vehicle. Well once you're all done your truck will be sitting right back where it should be.
