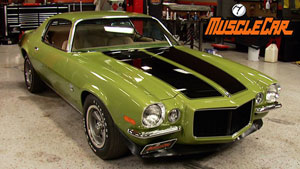
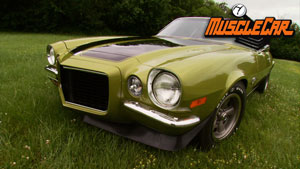
More '70 Chevy Camaro RS "Limelight" Episodes
MuscleCar Builds
Want more content like this?
Join the PowerNation Email NewsletterParts Used In This Episode
Matco Tools
Handy Bearing Packer
YearOne
Front and Rear Shock Absorber Set
YearOne
Front Coil Spring Pair
YearOne
Rear 5-Leaf Spring Pair
YearOne
Rear Leaf Spring Mounting Set
YearOne
Rear Sway Bar Attaching Support Rods
YearOne
Rear Sway Bar with Urethane Bushings
YearOne
Reproduction 1 1/4" Front Sway Bar"
Episode Transcript
Today on muscle car, learn how to blow a Subra apart for a suspension rebuild as our 70 Camaro get some factory upgrades, then get a look at the dirty underbelly of car restoration. Plus a former rust bucket rises from the dead
and project limelight gets a 12 volt rear.
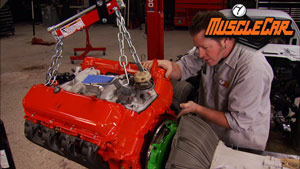
Hey guys, welcome to muscle car project. Limelight is back in the shop for the next step in the transformation from a basic bare bones Rs into a full blown big block Ss. Today we're gonna replace the old suspension steering and brakes and to go with that 396 that's dropping in, we plan to upgrade the rear axle to a 12 volt.
Since this is a stock style build, we plan to use parts that look as close to the originals as we can.
We picked up the 70 Rs Camaro in California hoping that it would be a solid foundation and boy did it pay off the floorboards look almost new.
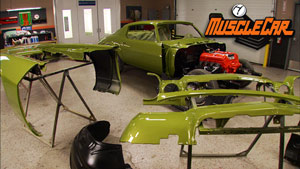
We blew it apart and pulled out the old 307 to make way for the 396 we're going to rebuild after having it blasted, we took care of some sheet metal damage patched in a rust spot. Then got the body ready for the first coat of primer
with all the body work roughed in. It's time to turn our attention to suspension. First, we need to strip the sub frame down to its bones just like a Thanksgiving Day turkey.
A lot of these parts will be replaced or upgraded, but some of the hardware will be reused. So we'll keep it all organized.
once the sub frame is bare, only four bows have to come out to separate it from the body for clean up and paint. The original control runs were blasted painted and had new stock bushings and ball joints pressed in. So they're ready to bolt back in place.
We removed the old small block mounts earlier to make way for the shorter big block mounts.
The next step are the coil springs. There's more to installing these things than just bolting them in. They need to be compressed. But without the weight of the engine and the rest of the car to help us, we're gonna need a specialty tool and that's where spring compressor comes in.
Now,
this isn't a tool that most guys are likely to have laying around the shop. In fact, we don't even have one. We rented this one from a local auto parts store, just make sure to ask them for an internal compressor. If your springs installed into the frames like these, the safest way to use this tool is to preload the,
using the hand ratchet, then you can finish the job with an air ratchet. Don't use an impact. You can damage the tool and even cause serious injury. Now, once it's compressed enough to fit, slide it into the spring pocket and use a jack to support the control arm while the spindle is bolted in place.
If you don't like the idea of compressing the springs yourself, you can take them to a shop and have them banded, then just cut the bands off. Once the spindle is bolted to the A R
before you remove the tool, make sure the springs are seeded into the pockets correctly. Otherwise you'll have to repeat this whole procedure.
We're replacing the standard shocks with G MS heavy duty versions from year one. These are correct ones for F 41 suspension upgrade.
We rebuilt our original steering box. So it's going right back where it came from for a video clip detailing this rebuild, visit the muscle car page of power block tv.com. Now, we can start tying the two sides together, starting with the idler arm which is hooked to the steering box by the centrelink.
The outer tire audience connect to the spindle and the inner tire audience connect to the center link. This front steer set up marks a big improvement over the first Gen's rear steer
coming up how to pack bearings easy without getting greasy and later, a charger RT 446 pack.
Hey guys, welcome back when you're doing a stock restoration. Well, sometimes you have to make a decision between exact originals or close reproductions. Now, if you're doing a chalk mark numbers matching kind of build, well, then it's obvious you have to go with the exact correct parts. But if you're going with a driver style build, like we are with limelight,
well,
can be good. Take the brake rotors, for example, the originals have a we indicator groove and part numbers cast riot in whereas the rep pops don't,
but we'd really rather not use the original because it could be warped, cracked. I mean, honestly, who knows? So we're gonna go with a safer alternative and use the aftermarket one even if it's not quite exactly correct.
Hey guys, keep your hands clean. I can take care of the bear.
Oh, cool. Thanks, man. I appreciate it. I'll go get the way bar ready to go. Good deal.
I've shown you before how to pack bearings the old fashioned way. But today I'm gonna get it done without the mess with a mat co bearing packer with the reservoir full of royal purple bearing grease. All I have to do is drop in a bearing face down and press on the plunger
check to make sure you can see the grease oozing through all the gaps. Then you know, it's ready to go in the rotary,
gently tap in the seal, flip it over and fill the hub with some more grease
drop in the outer bearing and the rotor is ready to install.
When installing new wheel bearings, it's important to set to preload. Or you may end up having to replace them again.
You set them too tight. They'll build heat and burn up too loose and they'll move around on a spindle, tearing themselves apart
with the rotor set in place on the spindle, wrench it down good and tight to set the bearing on the shaft back off the nut about a half turn
and snug it back down, making sure the rotor can be turned by hand and don't forget the cutter pin
and the grease cap
before I finish up by installing the caliper, I'm gonna clean the braking service with some cleaner new rotors are shipped with a waxy coating and if you don't remove it, it can clog up your pads.
A couple of swipes is all it takes. Then I can drop on the caliper.
And the last piece we're gonna add to the front end is a sway bar. Now, most Camaros came from the factory with a 15/16 bar. But if you ordered a big block, then you got the F 41 suspension package along with a much beefier inch and a quarter bar. It uses the same mounting holes and the bushings will even fit the original brackets.
Installing a sway bar is pretty straightforward. If you're doing this by yourself. A jack comes in handy for some extra support
grease in the bar or bushings before they go on will prevent squeaks. Use the jack to raise the bar into position, then tighten the bolt a few turns just to hold everything in place.
We'll leave all the bolts loose until the cars are ride height to prevent binding
up. Next. This baby is a beauty but she's no trailer queen and later, Rick loses control of his rear end.
Today's flashback, a 1970 Charger RT
I was playing pool, the tavern with a barmaid name right in tooth roof.
And a man pulls up in a Ford short bed pickup truck
uh with something really radical under the hood, it was a 446 pack much like the one growling beneath the hood of the 70 Charger RT.
The owner of the truck was selling a charger this one
back,
but it didn't look anything like it does. Now, it had a chicken coupon top and enough clothes to start a yard sale inside of it.
Uh It was in pretty bad shape.
They didn't run
the original motor was gone. So Bill traded a camper top and a set of race s
for the rust bucket
after taking it home and trying to fix it up, he soon realized he was in way over his head and it sat in a barn for 20 years when he finally got to work restoring it. He discovered the car originally had a 446 pack. The same motor in that old pickup. A
bill found one out of a junk super beat and the frame off. Rusto wound up taking over four years. 70 was the first time the six pack was offered. You could only ordered on the RT and just 684 got it.
The three Deuces helped churn out 390 horsepower and it had more low end torque than
hemi a first pistol grip shifter gave you marksman like control RT s were made for road or track. So you got extra heavy duty suspension rolling on a set of F 70 by 14 wide tread tires.
Plus there was that nifty race style gas cap.
The Chargers design had evolved quite a bit since it was introduced in 66.
The leader is here.
New Dodge Charger, the dream car that had to see the light of day
built as a fast back on the Coronet chassis. It was part of street machine and part family car it sold ok, but really took off in 68 when the second gen was unveiled sleeker body lines and more aggressive front end gave it that signal.
The 70 Charger was the last of the second GEN design and changes. Well, they were subtle.
It still had those groovy hidden headlights but a new wrap around chrome bumper was added.
RT models now had simulated side scoops
in the rear. The tail light hasn't stretched the full width of the tail panel.
The car was originally ordered by soldiers stationed overseas. It was labeled for export on the door jam and under the hood even though it never left the state
that soldier was just looking for a fast ride.
So the only options besides the six pack are a set of race gauges and an eight track.
He did choose a pretty wild interior though. The rare shade of burnt orange
when Hale restored the car, he wanted it to be just the way that soldier ordered it, which means this baby is a real warrior. I enjoy driving it
as
far as I'm concerned. Trailers and boats
after the break when it rains, it pours.
You're watching Muscle Car for a DVD copy of this episode. Just go to Power Block tv.com and order your copy for just 595 plus shipping and handling. Start your own muscle car collection delivered right to your door from the power block.
Hey, welcome back to muscle car. Earlier in the show, we got our front and assembled to our sub Frank. But before we can bolt it under the car, we've got to get some paint on the undercarriage and that means it's time for the old rear end to come out when you're pulling heavy parts off a vehicle that's being supported like this. Make sure you keep your weight balance in mind if you pull off a heavy part like a front Subra
that's gonna make the vehicle tail heavy. So you're either gonna have to support the back end or add weight to the nose like we did.
Since we're replacing everything. It's easiest just to pull it all out in one big chunk.
All we have to do is on both the lee springs shocks and brake line and the whole assembly drops right out.
So back,
got it.
The in a carriage of a car is an area that most people don't really put a lot of thought into, but a true rebuild isn't complete without giving it some attention. Now, this car came from the factory with a lacquer base sealer primer. We could roll it into the booth and reapply it. But I know of an E
or cheaper alternative
build on a budget muscle car projects that save you time and money
enamel based aerosol is gonna give us a look that's very close to the original dup color semi gloss engine enamel is perfect for this job. It's tough, washable heat resistant and it's gonna give us the look we're after.
But first we gotta do some clean up. 40 years of grunge needs to hit the floor before we can even think about paint.
No high tech tools here. Just scraper cleaner and a whole bunch of elbow grease.
I'll tell you what guys, if you can do this outside with a pressure washer, I would highly recommend it
doing it inside on the lift took longer since we had to use pump sprayers. Not to mention
it made a real mess that we had to clean up later.
It's important to get the moisture out of all the nooks and crannies
by either using compressed air or a lot of drying time.
Next, we'll hit the bare metal spots with some duplicate
edge primer. It'll help the top coated here better.
Once it's all prepped and etched, we can beautify it with a semi gloss enamel. One of the reasons we chose this product is it covers really quick.
We shot the entire undercarriage with a single coat and you can see what a difference it makes.
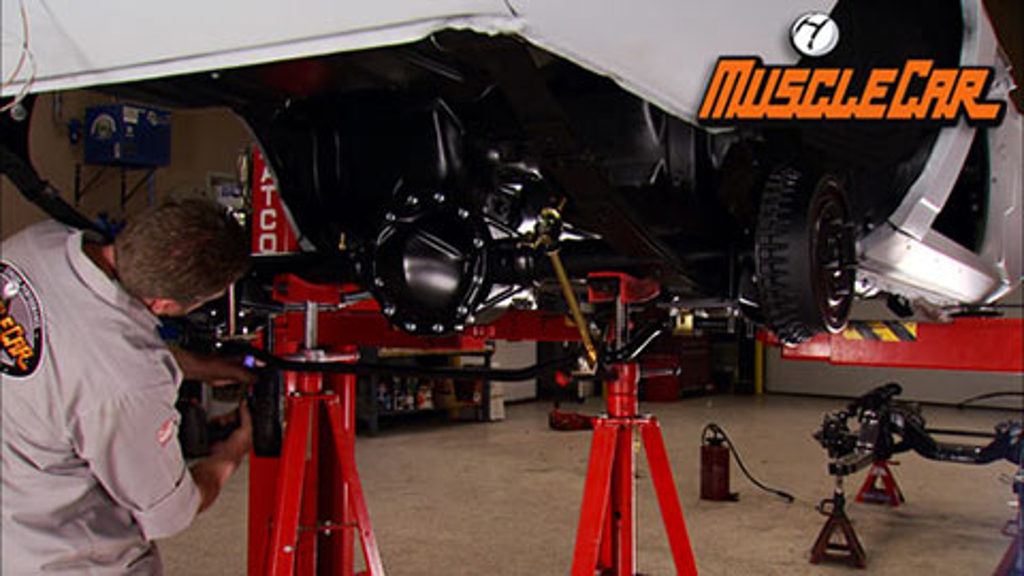
The original rear end that we pulled out earlier was just a standard GM 10 bolt, which isn't a bad rear end, but we're gonna go one step better with a 12 bolt. That 1970 was the only year of the second gen that this option was available and it was only available on the SSS and the Z 28. So they're not easy to come by, but we didn't have to look far because Mosier Engineering Sinister 12 volt muscle pack,
a complete rear end assembly with brakes and model specific purchase already installed. So all you have to do is pick your options and bolt it in
attaching the leaf springs to the front mounts before the axle goes in, makes installation a whole lot easier. Our rale sport came from the factory with standard springs, but the performance package calls for heavy duty ones. So year one hook us up with the correct set.
Now, we had some options when we ordered up our motor muscle pack including gear ratios and brakes. Now, they do have some great disc brake packages. But in 1970 Camaros only came with drum brakes. So we ordered up stock replacements.
They also offer a wide range of gear ratios. 70 Ss could have been ordered with a 410. But we wanted this thing a little more street.
So we went with the 355 which was standard on the SS. After bolting the leaf springs into the shackles, we can adjust the position of the rear end over the spring
rick. You wanna come on up with pretty good on my side too.
If you're doing this on your garage floor, you'd lower the rear end onto the springs.
But since we're working on a lift, we'll raise the car to the rear end.
Once it's in place, we can cinch it all down with new U bolts, making sure to install our new pads and sway bar mounts.
Now it's ready for the rear sway bar.
Everything we need to install the Mosier muscle pack including shocks, sway bar and all the hardware came straight from year one.
Since our Camaro didn't come with a sway bar, we need to add a couple of holes in the frame rails to finish the installs
with the rear suspension done. All we need is some wheels and a Subra
bolted back on it and we'll have us a roller ready for a big block.
The completed front clip goes on just as easy as it came off with four bolts, some lock tight thread locker and a new set of body bushes.
We've made a lot of progress on project limelight today. Now, we've got a completely rebuilt front end, a 12 bolt, rear, upgraded springs and sway bars and not to mention a great looking bottom side.
Now, we can put together that L 78 big block, but we're all out of time for today. So until next time, y'all keep it between the ditches.
Show Full Transcript
and project limelight gets a 12 volt rear.
Hey guys, welcome to muscle car project. Limelight is back in the shop for the next step in the transformation from a basic bare bones Rs into a full blown big block Ss. Today we're gonna replace the old suspension steering and brakes and to go with that 396 that's dropping in, we plan to upgrade the rear axle to a 12 volt.
Since this is a stock style build, we plan to use parts that look as close to the originals as we can.
We picked up the 70 Rs Camaro in California hoping that it would be a solid foundation and boy did it pay off the floorboards look almost new.
We blew it apart and pulled out the old 307 to make way for the 396 we're going to rebuild after having it blasted, we took care of some sheet metal damage patched in a rust spot. Then got the body ready for the first coat of primer
with all the body work roughed in. It's time to turn our attention to suspension. First, we need to strip the sub frame down to its bones just like a Thanksgiving Day turkey.
A lot of these parts will be replaced or upgraded, but some of the hardware will be reused. So we'll keep it all organized.
once the sub frame is bare, only four bows have to come out to separate it from the body for clean up and paint. The original control runs were blasted painted and had new stock bushings and ball joints pressed in. So they're ready to bolt back in place.
We removed the old small block mounts earlier to make way for the shorter big block mounts.
The next step are the coil springs. There's more to installing these things than just bolting them in. They need to be compressed. But without the weight of the engine and the rest of the car to help us, we're gonna need a specialty tool and that's where spring compressor comes in.
Now,
this isn't a tool that most guys are likely to have laying around the shop. In fact, we don't even have one. We rented this one from a local auto parts store, just make sure to ask them for an internal compressor. If your springs installed into the frames like these, the safest way to use this tool is to preload the,
using the hand ratchet, then you can finish the job with an air ratchet. Don't use an impact. You can damage the tool and even cause serious injury. Now, once it's compressed enough to fit, slide it into the spring pocket and use a jack to support the control arm while the spindle is bolted in place.
If you don't like the idea of compressing the springs yourself, you can take them to a shop and have them banded, then just cut the bands off. Once the spindle is bolted to the A R
before you remove the tool, make sure the springs are seeded into the pockets correctly. Otherwise you'll have to repeat this whole procedure.
We're replacing the standard shocks with G MS heavy duty versions from year one. These are correct ones for F 41 suspension upgrade.
We rebuilt our original steering box. So it's going right back where it came from for a video clip detailing this rebuild, visit the muscle car page of power block tv.com. Now, we can start tying the two sides together, starting with the idler arm which is hooked to the steering box by the centrelink.
The outer tire audience connect to the spindle and the inner tire audience connect to the center link. This front steer set up marks a big improvement over the first Gen's rear steer
coming up how to pack bearings easy without getting greasy and later, a charger RT 446 pack.
Hey guys, welcome back when you're doing a stock restoration. Well, sometimes you have to make a decision between exact originals or close reproductions. Now, if you're doing a chalk mark numbers matching kind of build, well, then it's obvious you have to go with the exact correct parts. But if you're going with a driver style build, like we are with limelight,
well,
can be good. Take the brake rotors, for example, the originals have a we indicator groove and part numbers cast riot in whereas the rep pops don't,
but we'd really rather not use the original because it could be warped, cracked. I mean, honestly, who knows? So we're gonna go with a safer alternative and use the aftermarket one even if it's not quite exactly correct.
Hey guys, keep your hands clean. I can take care of the bear.
Oh, cool. Thanks, man. I appreciate it. I'll go get the way bar ready to go. Good deal.
I've shown you before how to pack bearings the old fashioned way. But today I'm gonna get it done without the mess with a mat co bearing packer with the reservoir full of royal purple bearing grease. All I have to do is drop in a bearing face down and press on the plunger
check to make sure you can see the grease oozing through all the gaps. Then you know, it's ready to go in the rotary,
gently tap in the seal, flip it over and fill the hub with some more grease
drop in the outer bearing and the rotor is ready to install.
When installing new wheel bearings, it's important to set to preload. Or you may end up having to replace them again.
You set them too tight. They'll build heat and burn up too loose and they'll move around on a spindle, tearing themselves apart
with the rotor set in place on the spindle, wrench it down good and tight to set the bearing on the shaft back off the nut about a half turn
and snug it back down, making sure the rotor can be turned by hand and don't forget the cutter pin
and the grease cap
before I finish up by installing the caliper, I'm gonna clean the braking service with some cleaner new rotors are shipped with a waxy coating and if you don't remove it, it can clog up your pads.
A couple of swipes is all it takes. Then I can drop on the caliper.
And the last piece we're gonna add to the front end is a sway bar. Now, most Camaros came from the factory with a 15/16 bar. But if you ordered a big block, then you got the F 41 suspension package along with a much beefier inch and a quarter bar. It uses the same mounting holes and the bushings will even fit the original brackets.
Installing a sway bar is pretty straightforward. If you're doing this by yourself. A jack comes in handy for some extra support
grease in the bar or bushings before they go on will prevent squeaks. Use the jack to raise the bar into position, then tighten the bolt a few turns just to hold everything in place.
We'll leave all the bolts loose until the cars are ride height to prevent binding
up. Next. This baby is a beauty but she's no trailer queen and later, Rick loses control of his rear end.
Today's flashback, a 1970 Charger RT
I was playing pool, the tavern with a barmaid name right in tooth roof.
And a man pulls up in a Ford short bed pickup truck
uh with something really radical under the hood, it was a 446 pack much like the one growling beneath the hood of the 70 Charger RT.
The owner of the truck was selling a charger this one
back,
but it didn't look anything like it does. Now, it had a chicken coupon top and enough clothes to start a yard sale inside of it.
Uh It was in pretty bad shape.
They didn't run
the original motor was gone. So Bill traded a camper top and a set of race s
for the rust bucket
after taking it home and trying to fix it up, he soon realized he was in way over his head and it sat in a barn for 20 years when he finally got to work restoring it. He discovered the car originally had a 446 pack. The same motor in that old pickup. A
bill found one out of a junk super beat and the frame off. Rusto wound up taking over four years. 70 was the first time the six pack was offered. You could only ordered on the RT and just 684 got it.
The three Deuces helped churn out 390 horsepower and it had more low end torque than
hemi a first pistol grip shifter gave you marksman like control RT s were made for road or track. So you got extra heavy duty suspension rolling on a set of F 70 by 14 wide tread tires.
Plus there was that nifty race style gas cap.
The Chargers design had evolved quite a bit since it was introduced in 66.
The leader is here.
New Dodge Charger, the dream car that had to see the light of day
built as a fast back on the Coronet chassis. It was part of street machine and part family car it sold ok, but really took off in 68 when the second gen was unveiled sleeker body lines and more aggressive front end gave it that signal.
The 70 Charger was the last of the second GEN design and changes. Well, they were subtle.
It still had those groovy hidden headlights but a new wrap around chrome bumper was added.
RT models now had simulated side scoops
in the rear. The tail light hasn't stretched the full width of the tail panel.
The car was originally ordered by soldiers stationed overseas. It was labeled for export on the door jam and under the hood even though it never left the state
that soldier was just looking for a fast ride.
So the only options besides the six pack are a set of race gauges and an eight track.
He did choose a pretty wild interior though. The rare shade of burnt orange
when Hale restored the car, he wanted it to be just the way that soldier ordered it, which means this baby is a real warrior. I enjoy driving it
as
far as I'm concerned. Trailers and boats
after the break when it rains, it pours.
You're watching Muscle Car for a DVD copy of this episode. Just go to Power Block tv.com and order your copy for just 595 plus shipping and handling. Start your own muscle car collection delivered right to your door from the power block.
Hey, welcome back to muscle car. Earlier in the show, we got our front and assembled to our sub Frank. But before we can bolt it under the car, we've got to get some paint on the undercarriage and that means it's time for the old rear end to come out when you're pulling heavy parts off a vehicle that's being supported like this. Make sure you keep your weight balance in mind if you pull off a heavy part like a front Subra
that's gonna make the vehicle tail heavy. So you're either gonna have to support the back end or add weight to the nose like we did.
Since we're replacing everything. It's easiest just to pull it all out in one big chunk.
All we have to do is on both the lee springs shocks and brake line and the whole assembly drops right out.
So back,
got it.
The in a carriage of a car is an area that most people don't really put a lot of thought into, but a true rebuild isn't complete without giving it some attention. Now, this car came from the factory with a lacquer base sealer primer. We could roll it into the booth and reapply it. But I know of an E
or cheaper alternative
build on a budget muscle car projects that save you time and money
enamel based aerosol is gonna give us a look that's very close to the original dup color semi gloss engine enamel is perfect for this job. It's tough, washable heat resistant and it's gonna give us the look we're after.
But first we gotta do some clean up. 40 years of grunge needs to hit the floor before we can even think about paint.
No high tech tools here. Just scraper cleaner and a whole bunch of elbow grease.
I'll tell you what guys, if you can do this outside with a pressure washer, I would highly recommend it
doing it inside on the lift took longer since we had to use pump sprayers. Not to mention
it made a real mess that we had to clean up later.
It's important to get the moisture out of all the nooks and crannies
by either using compressed air or a lot of drying time.
Next, we'll hit the bare metal spots with some duplicate
edge primer. It'll help the top coated here better.
Once it's all prepped and etched, we can beautify it with a semi gloss enamel. One of the reasons we chose this product is it covers really quick.
We shot the entire undercarriage with a single coat and you can see what a difference it makes.
The original rear end that we pulled out earlier was just a standard GM 10 bolt, which isn't a bad rear end, but we're gonna go one step better with a 12 bolt. That 1970 was the only year of the second gen that this option was available and it was only available on the SSS and the Z 28. So they're not easy to come by, but we didn't have to look far because Mosier Engineering Sinister 12 volt muscle pack,
a complete rear end assembly with brakes and model specific purchase already installed. So all you have to do is pick your options and bolt it in
attaching the leaf springs to the front mounts before the axle goes in, makes installation a whole lot easier. Our rale sport came from the factory with standard springs, but the performance package calls for heavy duty ones. So year one hook us up with the correct set.
Now, we had some options when we ordered up our motor muscle pack including gear ratios and brakes. Now, they do have some great disc brake packages. But in 1970 Camaros only came with drum brakes. So we ordered up stock replacements.
They also offer a wide range of gear ratios. 70 Ss could have been ordered with a 410. But we wanted this thing a little more street.
So we went with the 355 which was standard on the SS. After bolting the leaf springs into the shackles, we can adjust the position of the rear end over the spring
rick. You wanna come on up with pretty good on my side too.
If you're doing this on your garage floor, you'd lower the rear end onto the springs.
But since we're working on a lift, we'll raise the car to the rear end.
Once it's in place, we can cinch it all down with new U bolts, making sure to install our new pads and sway bar mounts.
Now it's ready for the rear sway bar.
Everything we need to install the Mosier muscle pack including shocks, sway bar and all the hardware came straight from year one.
Since our Camaro didn't come with a sway bar, we need to add a couple of holes in the frame rails to finish the installs
with the rear suspension done. All we need is some wheels and a Subra
bolted back on it and we'll have us a roller ready for a big block.
The completed front clip goes on just as easy as it came off with four bolts, some lock tight thread locker and a new set of body bushes.
We've made a lot of progress on project limelight today. Now, we've got a completely rebuilt front end, a 12 bolt, rear, upgraded springs and sway bars and not to mention a great looking bottom side.
Now, we can put together that L 78 big block, but we're all out of time for today. So until next time, y'all keep it between the ditches.
