More '70 Chevy Nova "Old Blue Hair" Episodes
More Project Blue Hair Episodes
MuscleCar Builds
Want more content like this?
Join the PowerNation Email NewsletterParts Used In This Episode
Auto Custom Carpets INC.
VINYL FLOORING.
Auto Meter
3 3/8 TACH.
ididit Inc.
Steering column.
McLeod Industries
FLYWHEEL, CLUTCH, AND BELLHOUSING.
Mickey Thompson
235/60R15 E/T STREET RADIAL.<br>
26 X 6.00 R 15 SPORTSMAN S/R RADIAL.
Moroso
Mid-mount Plate.
Episode Transcript
Welcome to muscle car. We're about ready to go out and find a victim for old blue hair to abuse. But before we do that,
I gotta tell you where we've been
in the last few weeks, we wired up that carbureted G MLS 364 to a computerized controller from fast,
created a loop fuel system to avoid unwanted pressure. Build up, beefed up the rear end with an eating posit unit
411 street gears from Richmond
and carbon steel axles from Superior.
We threw out the mono leafs and made some
Mopar style super stock rear spring.
We started with stock replacement leaf springs, shortened some of the leaves and added another one. So this spring pack won't twist when we're trying to hook up.
We finished up the cooling system and put a serpentine set up from Detroit speed and engineering then crossed our fingers, fired it up
just for fun. We installed some electric cutouts to hide old blue hairs temper which we plan to unleash. This week,
we got a lot of work to do. This week, we gotta finish the drive line, put in the transmission tunnel, then tighten up the interior but first
we gotta put in a clutch.
We're running the Rockland T 56 6.
You see a lot of these in some hot street cars we put it in without a clutch or a pressure plate just to mock everything up.
We pulled out the transmission for the last time so we can finish it and it all starts with a good fly wheel. Now, a lot of guys would use aluminum
but I'm going with steel because I'm gonna abuse the hell out of him.
The factory put in an 11 inch fly wheel, but I'm throwing in a 12 inch upgrade, that'll give me more contact area.
And if you scar it up, you can always have it resurface,
be sure to remove your paw prints,
use brake parts cleaner. It doesn't leave an oily film like carburetor cleaner does
mcleod hooked me up with this LS series 100 clutch, unlike most clutches which are made out of semi
metallic material. This one's made out of organic fibers,
that means it won't throw me around between shifts and it has all the performance of racing clutch but would have. So
the red,
this diaphragm style pressure plate is perfect for street and track applications. This will give me more leverage, making it easier when I push in the clutch without affecting the clamping load.
If your clutching pressure plate comes bolted together, it's more than likely balanced. So, what I did was I marked it so I can put it back together the way it came apart.
Well, my drive shaft isn't in yet, so I'm pretty much done underneath for right now. But if you guys remember this thing was an automatic and I'm making it a stick. So I got some other work to do.
We got this hydraulic clutch set up from Kesler
comes with everything you need, including the reservoir.
But the toughest thing to put in is the pedals. So they're going in first.
It's really not that complicated. It's just hard to get to
these new pedals. Simply use a factory brake pedal mount.
All I have to do is drill the holes and attach the slave cylinder to the firewall
mount, the fluid reservoir
run hoses
and connect the clutch pedal to the slave cylinder rod.
The last piece of business is the hydraulic line from the slave cylinder to the train,
then fill the reservoir
and bleed it.
I'll let gravity do the work for me.
The automatic to manual conversion can be a real pain in the butt. Everything from fab in your linkage to adjusting your clutch. But with the hydraulic set up is far less hardware, there's almost no adjustment.
Now, some of you guys at the head of the class may realize I put this wicked clutch in my stock bell housing
a lot of you guys must be doing a similar set up because my scat shields on back order.
So I'm temporarily using this trans blanket from RC I to keep from playing, catch the fly wheel.
And now it's finally time to get rid of the fast Freddie hole in the floor. It's time for the fabrication.
Shoving this massive engine and trans in here was like putting a wetsuit on Barney,
you know, that purple dinosaur.
So I had to get rid of a few acres of flooring.
I even had to remove a section of floor bracing to make way for the elevated drive shaft.
So starting with some 18 thick steel,
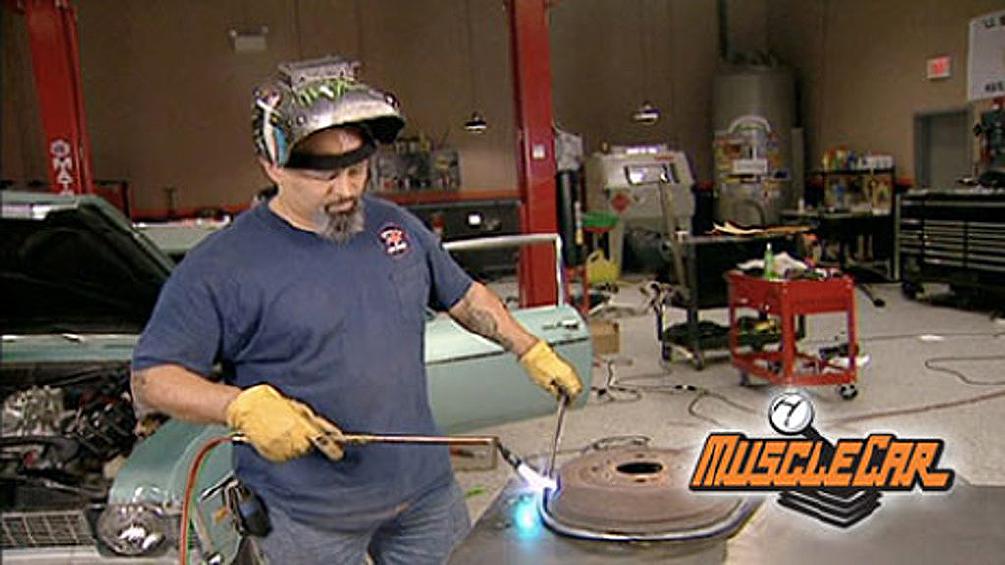
I'm making a box start.
This will give back the needed support and be a platform for the tin work.
Who that steals hot,
don't get.
And now I can get started on the tunnel.
18 gauge gives me the strength I need
and it's flexible enough to bend it the way I want.
If you don't have a slip roller like this one, use your imagination.
I've made plenty of beautiful rolls with an oxygen bottle
and a piece of wood.
Since this tunnel welds to the floor pan.
This one's got to go.
I be rolling the replacement
with just a little extra strength.
You guys get the gist of what's going on here while you take a break. I'm gonna keep working on the floor and when you get back, we'll see how good the seat fits.
Welcome back to the last day of our Sleeper project. Here's what we did earlier. We put in a hefty clutch set up from mccloud and started a transmission tunnel from the floor and while you were gone
we finished it off.
This tunnel looks really good if I do say so myself. Although I think it's a tad too tall for my bench seat.
As a matter of fact, it's about 10 inches too tall. Now, I could go to the junkyard and get some bucket seats, but I really wanna keep that sleeper. Look on the inside.
So I'm gonna try a little experiment.
I'm using some shop trash to make a jig
so I can bend the front center support.
It is.
Well,
now I'll flip it over and cut out a section of the seat frame. Yeah,
then I cut the spring frame so I can bring them up a little higher.
Now, remember there's no guarantees. This is an experiment
who said
you cannot make a bench seat fit with a 10 inch transmission tunnel
with some hog rings.
I'll tie a few things together.
Now, if the vinyl will stretch over this, we got it made.
I'm gonna let Brent wrestle with that. I've got to get on that old steering con because it's got that old automatic shift lever. This replacement from I did. It doesn't,
it's a direct fit with factory plugs for the wiring.
You can get these impo
aluminum, but black serves our purpose. So does the stock steering wheel
one last thing to wire up
in disguise.
He did not say anymore.
I'm about ready to finish off the interior. But before I cover all this tin work, I gotta seal it to keep the moisture out.
The guys at auto body color supply set us up with some three M cm sea
this stuff dries fast and last forever.
If you remember, I mounted our fast controller on the tow board.
So I made a box to keep it safe and out of sight
a little rattle campaign to seal the rest.
I saved this old flooring hoping to reuse it,
but that's not gonna cover that three story transmission tunnel. I could have ordered carpet,
but that'd be too easy.
I wanted to keep the stock looking floor in the car. So I decided to call auto custom carpets. They've been in the game for over 25 years and then the largest supplier of automotive carpeting and I knew they would have what I needed to do my floor.
We'll start by gluing in the supply padding to reduce the noise and the heat.
Then it's just a simple matter of getting it into place
and trimming it. The fish
no need to glue
the door sills are keep it where you want it.
I'm thrilled we were able to keep this bank seat
because short of the shifter, you can't get any closer to a stock look than this
one last thing
pine, of course.
And later on in the show.
Oh, blue hair is gonna leave the beauty shop
in the late sixties A MC had no muscle on the streets and they had to scramble to get one done and when it was all put together
they called it, what else the scrambler
this week's muscle car flashback, the 69 scrambler.
Even in the nicest neighborhoods. You never know what kind of dangerous beast might be lurking in the garage just waiting to strike.
How about a 315 horsepower 390
in a car? The size of a Honda Civic
A MC took the direct approach to performance. Back in 69
their largest engine crammed into a small car.
Plain Jane on the inside, painted like a circus wagon on the outside.
In one year, A MC offered the SC scrambler with two different war paint schemes
between that and the wicked ram air scoop. You knew this bad boy meant business. The scramblers got the same 394 barrel as the javelin and the AM X. They were real street legal race cars made to run N Hr A F Stop
A MC sold off 1512 special edition Hurst Sc scramblers. By the time they hit the showroom floors, they were sold. We ready,
Mike Lewis bought and sold five scrambles before he found the one he wanted to keep.
It's strictly a straight line car. No, phony car out of this.
This is a muscle car. This is not a sports car. One of the
no air, no power controls. No, nothing, just a light body with nothing on it. That didn't have to be there
plenty of oxygen for the fuel air mixture. Courtesy of that Ram Air set up
mis
manufactured to look identical to the ones on the 69 Hearst Os 442
heavy shocks and springs
all the way around.
Power dis breaks up front E 70 by 14 Goode
power
glass with red stripes
AM X wheels and the factory painted in blue with a rattle can
thrush mufflers for what a MC called that special tone
and frame connect is buried in the unibody to keep that 390 from twisting everything out of shape
inside. It was all economy
till you saw the eight grandson tack
and a horse
four speed hooked up to a Borg Warner T 10,
a 354 gear in the rear end and AM C's twin grip limited slip differential.
This was just about all. Original. Mike's even got the window sticker total price just over three grand with shipping.
That was about basic road runner cost for that same year.
The scramble is not worth as much today
but a MC prices have been creeping up
and the scramble in top shape will bring about 30 grand.
Mike says a lot of guys ask him if the scramble is an old noble when he takes it to the cruise in.
He doesn't mind explaining, but he really doesn't need to because the scrambler speaks pretty well for itself.
Hot car, cold sales. They just didn't move very many.
So they tried it later on with the rebel. Same results. They just didn't make any money,
but they did make history.
We'll be back.
Thanks for staying with us. We're almost done with old blue hair back here, but there's something and I just gotta settle earlier in the show. You watched me create my own floor pan.
Every time I used the bead roller to strengthen a piece of sheet metal,
I get these emails saying that bead rolls are strictly cosmetic.
Well, let's find out.
I've got two pieces of 16 gauge sheet metal. One of them is rolled. One of them is not.
Here we go. 40 81 21 60. It's going
200 pounds.
Let's see what the world can do.
Got it. Nice and square 4080 buck 20
buck 60
202 42
50 02 55 2 60.
I think we've proven a very important point here.
Be roll to this point is far superior than flat. Let's see how much more we can get
20 more to make it. 280.
Here we go. Placement is everything.
000
oh, thing of beauty.
Bead rolled is superior,
modern science. I love it.
Now, I'm no Mr Wizard, but at least now we've got an answer to that question. It's time to get back to work
before we go any further. This new tunnel needs some corrosion prevention.
I may apply some under coding later. But for now, this will do.
This is literally the last new part that's going on our Sleeper project. The drive shaft shop hooked us up with this three inch aluminum one piece unit
and it's pre balanced.
Now, all that's left are some last minute details.
There's got to be at least 100 puns I could say about what I'm doing right now. The old blue hair,
but I'm far more mature than that.
Now, the exhaust can go back on including our street camo.
Even though these parts are mostly new, it's better to be safe than sorry. So I'm gonna loop up the whole front end.
One of the most important decisions you'd make on any sleeper. More important than the drive line is you wheel entire combination because they're a tell tale sign of what you're packing. So I decided to go with this classic reproduction of the Corvette rally wheel from Coker tires.
My rubber selection was simple. Mickey Thompson came through with these 26 by six sportsmen sr radios for the front,
the rear got a pair of these new et street radios coming in at 2 35 60 R fifteens.
Now I chose this wheel entire combination for one simple reason, they accept junkyard hubcaps. These come from an 80 to 85 Malibu
and they complete the package.
Well, it's done. It's loaded with a new LS two and a six speed. Could it be better? Sure. It could, could it have been done differently? Yes. But this sleeper was built like a lot of you guys would have done it
on a shoestring budget.
We met our main goal. You'll never know what's under the hood till it's too late.
It's cold and sloppy outside and I didn't build it to Boggan when it warms up. We'll take off old granny's sweater and strap on a helmet. But until then I want you guys to email Power Block tv.com and tell me how you would test out old blue hair.
Me,
but for now
it's time to put granny to bed
until spring time
later.
Show Full Transcript
I gotta tell you where we've been
in the last few weeks, we wired up that carbureted G MLS 364 to a computerized controller from fast,
created a loop fuel system to avoid unwanted pressure. Build up, beefed up the rear end with an eating posit unit
411 street gears from Richmond
and carbon steel axles from Superior.
We threw out the mono leafs and made some
Mopar style super stock rear spring.
We started with stock replacement leaf springs, shortened some of the leaves and added another one. So this spring pack won't twist when we're trying to hook up.
We finished up the cooling system and put a serpentine set up from Detroit speed and engineering then crossed our fingers, fired it up
just for fun. We installed some electric cutouts to hide old blue hairs temper which we plan to unleash. This week,
we got a lot of work to do. This week, we gotta finish the drive line, put in the transmission tunnel, then tighten up the interior but first
we gotta put in a clutch.
We're running the Rockland T 56 6.
You see a lot of these in some hot street cars we put it in without a clutch or a pressure plate just to mock everything up.
We pulled out the transmission for the last time so we can finish it and it all starts with a good fly wheel. Now, a lot of guys would use aluminum
but I'm going with steel because I'm gonna abuse the hell out of him.
The factory put in an 11 inch fly wheel, but I'm throwing in a 12 inch upgrade, that'll give me more contact area.
And if you scar it up, you can always have it resurface,
be sure to remove your paw prints,
use brake parts cleaner. It doesn't leave an oily film like carburetor cleaner does
mcleod hooked me up with this LS series 100 clutch, unlike most clutches which are made out of semi
metallic material. This one's made out of organic fibers,
that means it won't throw me around between shifts and it has all the performance of racing clutch but would have. So
the red,
this diaphragm style pressure plate is perfect for street and track applications. This will give me more leverage, making it easier when I push in the clutch without affecting the clamping load.
If your clutching pressure plate comes bolted together, it's more than likely balanced. So, what I did was I marked it so I can put it back together the way it came apart.
Well, my drive shaft isn't in yet, so I'm pretty much done underneath for right now. But if you guys remember this thing was an automatic and I'm making it a stick. So I got some other work to do.
We got this hydraulic clutch set up from Kesler
comes with everything you need, including the reservoir.
But the toughest thing to put in is the pedals. So they're going in first.
It's really not that complicated. It's just hard to get to
these new pedals. Simply use a factory brake pedal mount.
All I have to do is drill the holes and attach the slave cylinder to the firewall
mount, the fluid reservoir
run hoses
and connect the clutch pedal to the slave cylinder rod.
The last piece of business is the hydraulic line from the slave cylinder to the train,
then fill the reservoir
and bleed it.
I'll let gravity do the work for me.
The automatic to manual conversion can be a real pain in the butt. Everything from fab in your linkage to adjusting your clutch. But with the hydraulic set up is far less hardware, there's almost no adjustment.
Now, some of you guys at the head of the class may realize I put this wicked clutch in my stock bell housing
a lot of you guys must be doing a similar set up because my scat shields on back order.
So I'm temporarily using this trans blanket from RC I to keep from playing, catch the fly wheel.
And now it's finally time to get rid of the fast Freddie hole in the floor. It's time for the fabrication.
Shoving this massive engine and trans in here was like putting a wetsuit on Barney,
you know, that purple dinosaur.
So I had to get rid of a few acres of flooring.
I even had to remove a section of floor bracing to make way for the elevated drive shaft.
So starting with some 18 thick steel,
I'm making a box start.
This will give back the needed support and be a platform for the tin work.
Who that steals hot,
don't get.
And now I can get started on the tunnel.
18 gauge gives me the strength I need
and it's flexible enough to bend it the way I want.
If you don't have a slip roller like this one, use your imagination.
I've made plenty of beautiful rolls with an oxygen bottle
and a piece of wood.
Since this tunnel welds to the floor pan.
This one's got to go.
I be rolling the replacement
with just a little extra strength.
You guys get the gist of what's going on here while you take a break. I'm gonna keep working on the floor and when you get back, we'll see how good the seat fits.
Welcome back to the last day of our Sleeper project. Here's what we did earlier. We put in a hefty clutch set up from mccloud and started a transmission tunnel from the floor and while you were gone
we finished it off.
This tunnel looks really good if I do say so myself. Although I think it's a tad too tall for my bench seat.
As a matter of fact, it's about 10 inches too tall. Now, I could go to the junkyard and get some bucket seats, but I really wanna keep that sleeper. Look on the inside.
So I'm gonna try a little experiment.
I'm using some shop trash to make a jig
so I can bend the front center support.
It is.
Well,
now I'll flip it over and cut out a section of the seat frame. Yeah,
then I cut the spring frame so I can bring them up a little higher.
Now, remember there's no guarantees. This is an experiment
who said
you cannot make a bench seat fit with a 10 inch transmission tunnel
with some hog rings.
I'll tie a few things together.
Now, if the vinyl will stretch over this, we got it made.
I'm gonna let Brent wrestle with that. I've got to get on that old steering con because it's got that old automatic shift lever. This replacement from I did. It doesn't,
it's a direct fit with factory plugs for the wiring.
You can get these impo
aluminum, but black serves our purpose. So does the stock steering wheel
one last thing to wire up
in disguise.
He did not say anymore.
I'm about ready to finish off the interior. But before I cover all this tin work, I gotta seal it to keep the moisture out.
The guys at auto body color supply set us up with some three M cm sea
this stuff dries fast and last forever.
If you remember, I mounted our fast controller on the tow board.
So I made a box to keep it safe and out of sight
a little rattle campaign to seal the rest.
I saved this old flooring hoping to reuse it,
but that's not gonna cover that three story transmission tunnel. I could have ordered carpet,
but that'd be too easy.
I wanted to keep the stock looking floor in the car. So I decided to call auto custom carpets. They've been in the game for over 25 years and then the largest supplier of automotive carpeting and I knew they would have what I needed to do my floor.
We'll start by gluing in the supply padding to reduce the noise and the heat.
Then it's just a simple matter of getting it into place
and trimming it. The fish
no need to glue
the door sills are keep it where you want it.
I'm thrilled we were able to keep this bank seat
because short of the shifter, you can't get any closer to a stock look than this
one last thing
pine, of course.
And later on in the show.
Oh, blue hair is gonna leave the beauty shop
in the late sixties A MC had no muscle on the streets and they had to scramble to get one done and when it was all put together
they called it, what else the scrambler
this week's muscle car flashback, the 69 scrambler.
Even in the nicest neighborhoods. You never know what kind of dangerous beast might be lurking in the garage just waiting to strike.
How about a 315 horsepower 390
in a car? The size of a Honda Civic
A MC took the direct approach to performance. Back in 69
their largest engine crammed into a small car.
Plain Jane on the inside, painted like a circus wagon on the outside.
In one year, A MC offered the SC scrambler with two different war paint schemes
between that and the wicked ram air scoop. You knew this bad boy meant business. The scramblers got the same 394 barrel as the javelin and the AM X. They were real street legal race cars made to run N Hr A F Stop
A MC sold off 1512 special edition Hurst Sc scramblers. By the time they hit the showroom floors, they were sold. We ready,
Mike Lewis bought and sold five scrambles before he found the one he wanted to keep.
It's strictly a straight line car. No, phony car out of this.
This is a muscle car. This is not a sports car. One of the
no air, no power controls. No, nothing, just a light body with nothing on it. That didn't have to be there
plenty of oxygen for the fuel air mixture. Courtesy of that Ram Air set up
mis
manufactured to look identical to the ones on the 69 Hearst Os 442
heavy shocks and springs
all the way around.
Power dis breaks up front E 70 by 14 Goode
power
glass with red stripes
AM X wheels and the factory painted in blue with a rattle can
thrush mufflers for what a MC called that special tone
and frame connect is buried in the unibody to keep that 390 from twisting everything out of shape
inside. It was all economy
till you saw the eight grandson tack
and a horse
four speed hooked up to a Borg Warner T 10,
a 354 gear in the rear end and AM C's twin grip limited slip differential.
This was just about all. Original. Mike's even got the window sticker total price just over three grand with shipping.
That was about basic road runner cost for that same year.
The scramble is not worth as much today
but a MC prices have been creeping up
and the scramble in top shape will bring about 30 grand.
Mike says a lot of guys ask him if the scramble is an old noble when he takes it to the cruise in.
He doesn't mind explaining, but he really doesn't need to because the scrambler speaks pretty well for itself.
Hot car, cold sales. They just didn't move very many.
So they tried it later on with the rebel. Same results. They just didn't make any money,
but they did make history.
We'll be back.
Thanks for staying with us. We're almost done with old blue hair back here, but there's something and I just gotta settle earlier in the show. You watched me create my own floor pan.
Every time I used the bead roller to strengthen a piece of sheet metal,
I get these emails saying that bead rolls are strictly cosmetic.
Well, let's find out.
I've got two pieces of 16 gauge sheet metal. One of them is rolled. One of them is not.
Here we go. 40 81 21 60. It's going
200 pounds.
Let's see what the world can do.
Got it. Nice and square 4080 buck 20
buck 60
202 42
50 02 55 2 60.
I think we've proven a very important point here.
Be roll to this point is far superior than flat. Let's see how much more we can get
20 more to make it. 280.
Here we go. Placement is everything.
000
oh, thing of beauty.
Bead rolled is superior,
modern science. I love it.
Now, I'm no Mr Wizard, but at least now we've got an answer to that question. It's time to get back to work
before we go any further. This new tunnel needs some corrosion prevention.
I may apply some under coding later. But for now, this will do.
This is literally the last new part that's going on our Sleeper project. The drive shaft shop hooked us up with this three inch aluminum one piece unit
and it's pre balanced.
Now, all that's left are some last minute details.
There's got to be at least 100 puns I could say about what I'm doing right now. The old blue hair,
but I'm far more mature than that.
Now, the exhaust can go back on including our street camo.
Even though these parts are mostly new, it's better to be safe than sorry. So I'm gonna loop up the whole front end.
One of the most important decisions you'd make on any sleeper. More important than the drive line is you wheel entire combination because they're a tell tale sign of what you're packing. So I decided to go with this classic reproduction of the Corvette rally wheel from Coker tires.
My rubber selection was simple. Mickey Thompson came through with these 26 by six sportsmen sr radios for the front,
the rear got a pair of these new et street radios coming in at 2 35 60 R fifteens.
Now I chose this wheel entire combination for one simple reason, they accept junkyard hubcaps. These come from an 80 to 85 Malibu
and they complete the package.
Well, it's done. It's loaded with a new LS two and a six speed. Could it be better? Sure. It could, could it have been done differently? Yes. But this sleeper was built like a lot of you guys would have done it
on a shoestring budget.
We met our main goal. You'll never know what's under the hood till it's too late.
It's cold and sloppy outside and I didn't build it to Boggan when it warms up. We'll take off old granny's sweater and strap on a helmet. But until then I want you guys to email Power Block tv.com and tell me how you would test out old blue hair.
Me,
but for now
it's time to put granny to bed
until spring time
later.
