More Copperhead Episodes
Classic Trucks! Builds
Want more content like this?
Join the PowerNation Email NewsletterEpisode Transcript
Hey, welcome to trucks. Today's show is one that a lot of people including myself have been waiting for for a long time because it's time to roll Copperhead back into the spotlight.
Now, obviously, I've got a few things to do with this truck still before I can call it done.
And I've got some surprises for you on this project still. But before we do that,
I've been getting a lot of requests from people to take you back through the project and show you what I've done so far because there's a lot of people building classic trucks. So here we go back to the beginning
and the whole purpose for doing this project. First of all, it's going to be a high street truck. Second of all, it's gonna deal with one of the most popular body styles of truck ever built.
The 67 to 72 Chevrolet.
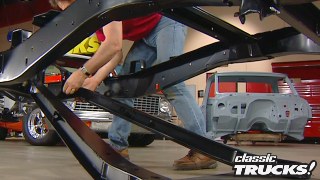
If you start with just the cab and the frame,
you can build this truck and most of it is just bolt on stuff. Now, I know a lot of you are probably saying, oh, wait a minute. Now, the old truck, you gotta, you gotta prove that to me. Well,
I thought you'd probably say that. So the only way to prove it to you
is to build one. What I'm starting with is literally a 67 cab, a
frame.
And of course, a title, you, you gotta have a title. You don't have a truck without that
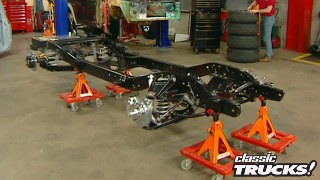
with the frame stripped and powder coated and the cab cleaned up and wearing a fresh coat of primer.
Well, we had a solid foundation
so it was time to start building.
Now, the first thing that you need to decide about any project is what direction you're gonna go. Now, this project is gonna be nice and low and smooth,
but it's not gonna detract from the original classic lines of the truck.
Gonna pretty much be the ultimate cruiser.
The first stop was to install new upper and lower control arms, ball joints, bush.
So everything will be firm and tight.
Now, for the lower ball joints,
those need to be pressed in. So
do not try to do this with a hammer, you'll need to take it down a good machine shop, just charge you a few bucks to have that done to
give us a nice starting point for our alignment.
Now, the bottom control arm, it's just held in place with these U bolts that come with the kit.
We followed that up with new drop spindles and springs to not only give us better handling
but also get the nose down where it belongs
to round out the handling package.
We also tossed in a quick ratio steering box
and bolted up a huge performance sway bar underneath.
Now, don't think for a second we forgot about the rear suspension. No, I needed some help too.
So new bushings and trailing arms were made it together
and then the trailing arms were installed with new springs
to make this thing sit down and have the right stance.
So far, things seemed pretty normal,
but I did drop a hint of what I had in mind for this truck when I installed the huge Dana 60 rear end and track bar.
Hm.
People begin to wonder
next. It was time to get the fuel tank out of the cab,
not the most desirable situation
and relocate it under the bed
and this custom tank from early classic fits so nice.
It makes you wonder why GM didn't do something like this at the factory.
Now to get the truck to stop like it should front disc brakes were added
and then to make the chassis a roller,
we slid on a hot wheel and tire combination to finish it all up.
Now with the chassis done, it was time for the drive train.
I had a lot of fun teasing you with this one. Tell me how cool it was gonna be,
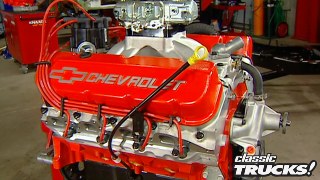
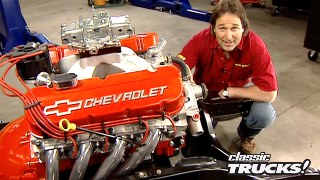
but I don't think anybody including Chevy was really prepared for when I finally whipped that cover off and revealed the very first production 572 crate engine.
The phones at GM performance literally rang off the hook as people try to find out more about this massive engine.
Now, wait a minute, let me repeat that to you. This is a 572 cubic inch engine.
It's been dyno
at 620 horsepower at the fly wheel and it's kicking out 650 ft pounds of torque
to go with that big old hunk of horsepower A built B and M Turbo 400 was wrestled into place. And then the whole lethal combination was laid to rest between the frame rails,
man. Is that awesome or what?
But we weren't quite finished yet. No, no, we needed more gears for high speed driving.
So in when a gear vendors overdrive
and then finally with the drive train in,
we were able to permanently mount the saddles to the axle and set opinion angle.
We'll be back with more copperhead after this.
Welcome back to trucks and a recap of this whole copperhead thing.
Now, when we left off, they had a rolling chassis in a drive train,
but I still had a few things to do before I could put the body on here. They are.
The first thing was to mount all of our pulleys and brackets and check to fit.
Now, here's how our inner fenders are gonna mount.
Notice how everything tucked down into this dead area here, like I said before, man, it's all about the details.
Then we slid in a custom drive shaft that's not supposed to ever break.
Yeah, we'll see about that one.
Now, the exhaust system took things even wilder as I installed a dual custom exhaust system
with twin electric exhaust cut outs.
That'll make this truck just as loud as it is fast.
I flipped the switch open up the exhaust cut out, that bypasses my main exhaust and now I'm running straight pipe right out of the 572 out the side
into the side of his head. And this is the last thing he's gonna hear before I uncork this thing and give him a really good look at my tail end.
As with any project like this, there is always some fabricating and designing that needs to be done
to make everything fit just right.
And
finally we topped everything off with a special air cleaner.
Oh, yeah.
There. Now you can see all that extra work it took to make this thing fit just right. Definitely worth it
at this point. It was all in but not finished. So
next, I pulled the whole drive train out, painted and detailed the engine while advanced plating chromed the special valve covers.
Now, while all this was going on
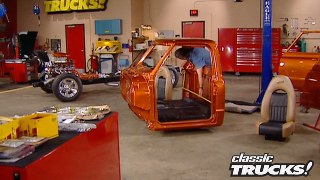
the cab and the body rolled out of the paint shop and they were looking good because Kevin Tates at paint education had spent hours smoothing it down
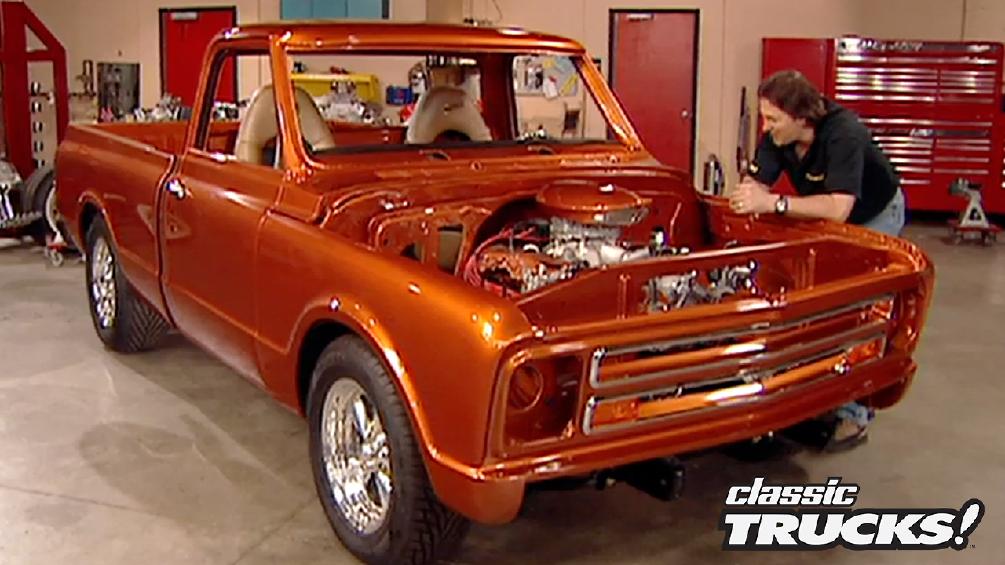
and shooting it with a special PPG copper color
that Ron Payton and I had created for this project.
The next stop was inside the cab to locate our new seat positioning
and then fabricate some brackets. So when we're ready to put them in,
they just bolt into place.
You wanna make sure that the seat is sitting high enough.
So you're looking through the center of the windshield, not through the bottom, not through the top, right through the center.
Make sure that you're planning ahead on your project.
Because if not, you might work yourself into a corner
with the sound deadening and carpet in place on the floor,
it was time to modify our dash. So
in with some performance gauges
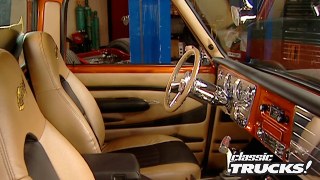
and instead of a stock dash, we installed this super slick matching cluster and glove box to really make the interior pop. Finally, some custom interior panels finished it all off.
When we come back, the body goes back together.
Hey, hey, we're back with Project Copperhead. Now when we left off, it was time to start putting this body back together.
So let's get to it.
Hold on because here we go,
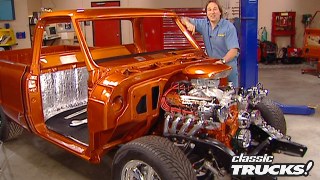
the first step was to lower the cap back down on the chassis,
check all our clearances and fit
and then bolted down.
Next, it was time to start putting the bed together.
And even though every one of these parts are reproductions,
the bed went together really easily.
And after you spend a little time fine tuning the fit.
This will look as good or better than any original bed.
Now, if you don't have lifting equipment like this,
you're gonna need at least four buddies to come in here and help you set this down on here.
That's it.
So you don't scratch the paint
buddy. We are on,
we finished off the rear with tail lights and a stock style bumper
and then it was time to move forward into the cab.
The first thing to go in was the steering column and the steering wheel
and then we'll position the column in the cab where we want it.
Now, you need to take your time here because this
this is where you make it fit, how you want it to fit.
And then we not only installed power windows,
but we converted the doors to one piece glass while we're at it to get rid of that vent wing.
Now with the doors all assembled and looking good.
It was time to install them on the cab.
Mhm
And adjust them
and the striker plate itself goes on the outside now
and adjust them
and adjust them until everything fit. Perfect.
So be prepared to spend a little time here fitting, checking, tweaking
until it's perfect and you can get it perfect even without weather stripping in there,
man, that looks nice, especially with that shaved drip rail.
Then finally, it was time to move on to the front end,
this old rig slowly begin to transform into a more and more recognizable truck with each piece that we put on.
Now, this is by far the most rewarding step of any build up because
you can finally step back and take a look at your creation for the first time
and see how it's gonna look.
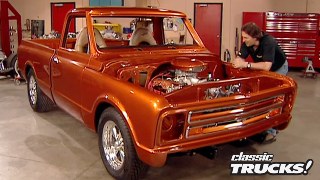
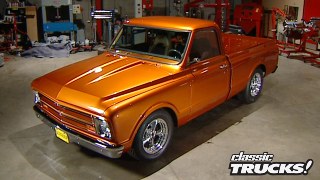
Get back, take a look at this thing. Is that sweet or what?
Well, there it is, we're all up to date and once they get to this point now it's just a matter of doing your plumbing and your wiring and your detail work, which we're gonna do. But like I said before, still have one big surprise for you on this project
and that is that you're gonna have to wait till next week to see it. Oh, man, don't you hate that?
One of the biggest investments that you can make in your truck other than just buying it is in a new set of wheels and tires because nothing sets the look and the personality of your rig like wheels and tires
and they're pretty expensive. So you want them to last as long as they can.
But how do you do that? Well,
number one, you keep them balanced.
What does that mean though? What's involved in that?
That's what we're gonna show you
how it works is brought to you by Wyotech.
All right, Mark, what we're gonna do is take the viewers through the process of balancing a tire.
Now, first, why don't you go ahead and explain to them what we're talking about when we say balance, ok. When they build a tire and they build the wheel just by the manufacturing process, they end up with heavy and light spots in both the tire and the wheel. Ok?
And what we're gonna do with this tire and wheel is we're gonna spin it on our machine up to probably in the neighborhood of 50 mile an hour, we're gonna find the light spot. We're gonna add the appropriate amount of wheel weights on the front and the back of the wheel to compensate for it. Ok.
Seen this before. It's car tire steel rim, got the weights on it
very common. Now, let's show you more we deal with on the show,
heavy off road tires. This is about a 35 inch here notorious for being out of balance mark, take us to the process. So we've got this mounted up on our 197 100 wheel balancer. Ok. And now is this the type of machine you see in most shows? It's becoming more popular, but it's really still not the industry standard. Ok.
What are we looking at here? Ok. Right now, this machine is applying about 400 pounds of pressure to the tread of this tire
seating, the beads checking for tire run out. Ok. Humps and valleys in the tire, that sort of thing.
OK. Measuring the diameter.
Ok.
Ok.
Now it's taking it back, gonna show us where we're gonna have to add the weight right now. Just stop and it's gonna spin in the opposite direction.
Like the 50 mile an hour we talked about earlier.
Ok. It's looking for the light.
The results are gonna come up for us. Right.
Guitar is out of balance.
She called that one pretty
close.
All right. Now, the arrows here are showing us where we need to add the weight on the outside.
All right.
Now, for weight, what are we gonna use here? This is a standard mag wheel weight. Ok. It's got a wide gap between your mounting tang and the weight itself
and you just hammer those on, hammer them onto the rim. All
different scenario. The guy's got his nice polished aluminum wheel doesn't want to scar it up. Hammering weights on, gotta use a stick on, stick
on weight. Now,
how accurate is that? Well, the stick on weights are fairly accurate,
but you're gonna sacrifice a little bit of your precision for the looks
because we can't put weight on either side in
the
center,
closer to the center of the.
How often should somebody balance a tire like this? Well, our general rule is if you're gonna get your oil changed around 3000 miles, 3500 to be a good idea
to save the tire and get the tires balanced at the same time, it just makes it real easy that way. Well,
hopefully this gives you an idea of what's going on when you take your tire down to have it balanced.
Make sure you keep them balanced as they wear. They're gonna get lumpy on you. You're gonna wear out
in the world of trucks. Guys have been using air bags to slam their trucks down on the ground for a long time. So it was only natural that they start using air bags to lift their trucks.
Unfortunately, if you wanted to do this, you know, you had to build the suspension yourself or you had to pay somebody to do it for you. Well, now you've got another choice and it comes from Kelderman air ride suspension.
That's right. It's like natural truck enhancement in the form of a bolt on air bag lift for your three quarter ton and your one ton trucks. Now, of course, the kit includes huge air bags to lift this truck up and down, but
it's a lot more than that.
This puts a state of the art four link suspension in the front and the rear of the truck. So you've got link bar,
bracketry, air bags and air compressor system,
your choice of shocks
and all the hardware you're gonna need to put this kid in.
And if you take a close look, you can see how well this is engineered and how nice it fits under this big diesel powered dodge.
But the real biggie is how, well it all works as it takes this truck from five inches of
to a massive 13 inches of lift with the flick of a switch and you can do it while you drive down the road.
So, if you've got a big four by four truck and you wanna make it even bigger, but you don't wanna lose the drive
of it or the usability of it.
You'd still like to get it in the garage once in a while.
Well, it sounds like you need to make a call to Kelderman Air Ride. Get one of these kits.
If you are a regular viewer of any of these automotive type shows, you are probably familiar with Royal Purple synthetic motor oil. What you may not be familiar with though are the other products they've got that are just as good. For example, you have this max tough assembly lube for your engine builders. You have this max EZ power steering fluid. Heck, you've even got synthetic oil for your air compressor. If you need performance oil, you need to call Royal Purple.
Show Full Transcript
Now, obviously, I've got a few things to do with this truck still before I can call it done.
And I've got some surprises for you on this project still. But before we do that,
I've been getting a lot of requests from people to take you back through the project and show you what I've done so far because there's a lot of people building classic trucks. So here we go back to the beginning
and the whole purpose for doing this project. First of all, it's going to be a high street truck. Second of all, it's gonna deal with one of the most popular body styles of truck ever built.
The 67 to 72 Chevrolet.
If you start with just the cab and the frame,
you can build this truck and most of it is just bolt on stuff. Now, I know a lot of you are probably saying, oh, wait a minute. Now, the old truck, you gotta, you gotta prove that to me. Well,
I thought you'd probably say that. So the only way to prove it to you
is to build one. What I'm starting with is literally a 67 cab, a
frame.
And of course, a title, you, you gotta have a title. You don't have a truck without that
with the frame stripped and powder coated and the cab cleaned up and wearing a fresh coat of primer.
Well, we had a solid foundation
so it was time to start building.
Now, the first thing that you need to decide about any project is what direction you're gonna go. Now, this project is gonna be nice and low and smooth,
but it's not gonna detract from the original classic lines of the truck.
Gonna pretty much be the ultimate cruiser.
The first stop was to install new upper and lower control arms, ball joints, bush.
So everything will be firm and tight.
Now, for the lower ball joints,
those need to be pressed in. So
do not try to do this with a hammer, you'll need to take it down a good machine shop, just charge you a few bucks to have that done to
give us a nice starting point for our alignment.
Now, the bottom control arm, it's just held in place with these U bolts that come with the kit.
We followed that up with new drop spindles and springs to not only give us better handling
but also get the nose down where it belongs
to round out the handling package.
We also tossed in a quick ratio steering box
and bolted up a huge performance sway bar underneath.
Now, don't think for a second we forgot about the rear suspension. No, I needed some help too.
So new bushings and trailing arms were made it together
and then the trailing arms were installed with new springs
to make this thing sit down and have the right stance.
So far, things seemed pretty normal,
but I did drop a hint of what I had in mind for this truck when I installed the huge Dana 60 rear end and track bar.
Hm.
People begin to wonder
next. It was time to get the fuel tank out of the cab,
not the most desirable situation
and relocate it under the bed
and this custom tank from early classic fits so nice.
It makes you wonder why GM didn't do something like this at the factory.
Now to get the truck to stop like it should front disc brakes were added
and then to make the chassis a roller,
we slid on a hot wheel and tire combination to finish it all up.
Now with the chassis done, it was time for the drive train.
I had a lot of fun teasing you with this one. Tell me how cool it was gonna be,
but I don't think anybody including Chevy was really prepared for when I finally whipped that cover off and revealed the very first production 572 crate engine.
The phones at GM performance literally rang off the hook as people try to find out more about this massive engine.
Now, wait a minute, let me repeat that to you. This is a 572 cubic inch engine.
It's been dyno
at 620 horsepower at the fly wheel and it's kicking out 650 ft pounds of torque
to go with that big old hunk of horsepower A built B and M Turbo 400 was wrestled into place. And then the whole lethal combination was laid to rest between the frame rails,
man. Is that awesome or what?
But we weren't quite finished yet. No, no, we needed more gears for high speed driving.
So in when a gear vendors overdrive
and then finally with the drive train in,
we were able to permanently mount the saddles to the axle and set opinion angle.
We'll be back with more copperhead after this.
Welcome back to trucks and a recap of this whole copperhead thing.
Now, when we left off, they had a rolling chassis in a drive train,
but I still had a few things to do before I could put the body on here. They are.
The first thing was to mount all of our pulleys and brackets and check to fit.
Now, here's how our inner fenders are gonna mount.
Notice how everything tucked down into this dead area here, like I said before, man, it's all about the details.
Then we slid in a custom drive shaft that's not supposed to ever break.
Yeah, we'll see about that one.
Now, the exhaust system took things even wilder as I installed a dual custom exhaust system
with twin electric exhaust cut outs.
That'll make this truck just as loud as it is fast.
I flipped the switch open up the exhaust cut out, that bypasses my main exhaust and now I'm running straight pipe right out of the 572 out the side
into the side of his head. And this is the last thing he's gonna hear before I uncork this thing and give him a really good look at my tail end.
As with any project like this, there is always some fabricating and designing that needs to be done
to make everything fit just right.
And
finally we topped everything off with a special air cleaner.
Oh, yeah.
There. Now you can see all that extra work it took to make this thing fit just right. Definitely worth it
at this point. It was all in but not finished. So
next, I pulled the whole drive train out, painted and detailed the engine while advanced plating chromed the special valve covers.
Now, while all this was going on
the cab and the body rolled out of the paint shop and they were looking good because Kevin Tates at paint education had spent hours smoothing it down
and shooting it with a special PPG copper color
that Ron Payton and I had created for this project.
The next stop was inside the cab to locate our new seat positioning
and then fabricate some brackets. So when we're ready to put them in,
they just bolt into place.
You wanna make sure that the seat is sitting high enough.
So you're looking through the center of the windshield, not through the bottom, not through the top, right through the center.
Make sure that you're planning ahead on your project.
Because if not, you might work yourself into a corner
with the sound deadening and carpet in place on the floor,
it was time to modify our dash. So
in with some performance gauges
and instead of a stock dash, we installed this super slick matching cluster and glove box to really make the interior pop. Finally, some custom interior panels finished it all off.
When we come back, the body goes back together.
Hey, hey, we're back with Project Copperhead. Now when we left off, it was time to start putting this body back together.
So let's get to it.
Hold on because here we go,
the first step was to lower the cap back down on the chassis,
check all our clearances and fit
and then bolted down.
Next, it was time to start putting the bed together.
And even though every one of these parts are reproductions,
the bed went together really easily.
And after you spend a little time fine tuning the fit.
This will look as good or better than any original bed.
Now, if you don't have lifting equipment like this,
you're gonna need at least four buddies to come in here and help you set this down on here.
That's it.
So you don't scratch the paint
buddy. We are on,
we finished off the rear with tail lights and a stock style bumper
and then it was time to move forward into the cab.
The first thing to go in was the steering column and the steering wheel
and then we'll position the column in the cab where we want it.
Now, you need to take your time here because this
this is where you make it fit, how you want it to fit.
And then we not only installed power windows,
but we converted the doors to one piece glass while we're at it to get rid of that vent wing.
Now with the doors all assembled and looking good.
It was time to install them on the cab.
Mhm
And adjust them
and the striker plate itself goes on the outside now
and adjust them
and adjust them until everything fit. Perfect.
So be prepared to spend a little time here fitting, checking, tweaking
until it's perfect and you can get it perfect even without weather stripping in there,
man, that looks nice, especially with that shaved drip rail.
Then finally, it was time to move on to the front end,
this old rig slowly begin to transform into a more and more recognizable truck with each piece that we put on.
Now, this is by far the most rewarding step of any build up because
you can finally step back and take a look at your creation for the first time
and see how it's gonna look.
Get back, take a look at this thing. Is that sweet or what?
Well, there it is, we're all up to date and once they get to this point now it's just a matter of doing your plumbing and your wiring and your detail work, which we're gonna do. But like I said before, still have one big surprise for you on this project
and that is that you're gonna have to wait till next week to see it. Oh, man, don't you hate that?
One of the biggest investments that you can make in your truck other than just buying it is in a new set of wheels and tires because nothing sets the look and the personality of your rig like wheels and tires
and they're pretty expensive. So you want them to last as long as they can.
But how do you do that? Well,
number one, you keep them balanced.
What does that mean though? What's involved in that?
That's what we're gonna show you
how it works is brought to you by Wyotech.
All right, Mark, what we're gonna do is take the viewers through the process of balancing a tire.
Now, first, why don't you go ahead and explain to them what we're talking about when we say balance, ok. When they build a tire and they build the wheel just by the manufacturing process, they end up with heavy and light spots in both the tire and the wheel. Ok?
And what we're gonna do with this tire and wheel is we're gonna spin it on our machine up to probably in the neighborhood of 50 mile an hour, we're gonna find the light spot. We're gonna add the appropriate amount of wheel weights on the front and the back of the wheel to compensate for it. Ok.
Seen this before. It's car tire steel rim, got the weights on it
very common. Now, let's show you more we deal with on the show,
heavy off road tires. This is about a 35 inch here notorious for being out of balance mark, take us to the process. So we've got this mounted up on our 197 100 wheel balancer. Ok. And now is this the type of machine you see in most shows? It's becoming more popular, but it's really still not the industry standard. Ok.
What are we looking at here? Ok. Right now, this machine is applying about 400 pounds of pressure to the tread of this tire
seating, the beads checking for tire run out. Ok. Humps and valleys in the tire, that sort of thing.
OK. Measuring the diameter.
Ok.
Ok.
Now it's taking it back, gonna show us where we're gonna have to add the weight right now. Just stop and it's gonna spin in the opposite direction.
Like the 50 mile an hour we talked about earlier.
Ok. It's looking for the light.
The results are gonna come up for us. Right.
Guitar is out of balance.
She called that one pretty
close.
All right. Now, the arrows here are showing us where we need to add the weight on the outside.
All right.
Now, for weight, what are we gonna use here? This is a standard mag wheel weight. Ok. It's got a wide gap between your mounting tang and the weight itself
and you just hammer those on, hammer them onto the rim. All
different scenario. The guy's got his nice polished aluminum wheel doesn't want to scar it up. Hammering weights on, gotta use a stick on, stick
on weight. Now,
how accurate is that? Well, the stick on weights are fairly accurate,
but you're gonna sacrifice a little bit of your precision for the looks
because we can't put weight on either side in
the
center,
closer to the center of the.
How often should somebody balance a tire like this? Well, our general rule is if you're gonna get your oil changed around 3000 miles, 3500 to be a good idea
to save the tire and get the tires balanced at the same time, it just makes it real easy that way. Well,
hopefully this gives you an idea of what's going on when you take your tire down to have it balanced.
Make sure you keep them balanced as they wear. They're gonna get lumpy on you. You're gonna wear out
in the world of trucks. Guys have been using air bags to slam their trucks down on the ground for a long time. So it was only natural that they start using air bags to lift their trucks.
Unfortunately, if you wanted to do this, you know, you had to build the suspension yourself or you had to pay somebody to do it for you. Well, now you've got another choice and it comes from Kelderman air ride suspension.
That's right. It's like natural truck enhancement in the form of a bolt on air bag lift for your three quarter ton and your one ton trucks. Now, of course, the kit includes huge air bags to lift this truck up and down, but
it's a lot more than that.
This puts a state of the art four link suspension in the front and the rear of the truck. So you've got link bar,
bracketry, air bags and air compressor system,
your choice of shocks
and all the hardware you're gonna need to put this kid in.
And if you take a close look, you can see how well this is engineered and how nice it fits under this big diesel powered dodge.
But the real biggie is how, well it all works as it takes this truck from five inches of
to a massive 13 inches of lift with the flick of a switch and you can do it while you drive down the road.
So, if you've got a big four by four truck and you wanna make it even bigger, but you don't wanna lose the drive
of it or the usability of it.
You'd still like to get it in the garage once in a while.
Well, it sounds like you need to make a call to Kelderman Air Ride. Get one of these kits.
If you are a regular viewer of any of these automotive type shows, you are probably familiar with Royal Purple synthetic motor oil. What you may not be familiar with though are the other products they've got that are just as good. For example, you have this max tough assembly lube for your engine builders. You have this max EZ power steering fluid. Heck, you've even got synthetic oil for your air compressor. If you need performance oil, you need to call Royal Purple.
